How to Grow Your Own Tomatoes
- horticulturist and gardening expertApril 17, 2021
Select the Best Tomato for You
You’ll find lots of varieties including various types of tomatoes for sale. Faced with so many choices and limited time and space it can be difficult to select the best tomato varieties for your containers and gardens.
Start with the end in mind. Consider how you plan to use your harvest. Do you want to grow tomatoes for slicing, cooking, making sauce, or canned and frozen for later use? Paste varieties like Roma, Amish Paste and Early Resilience have meaty fruit perfect for cooking while Better Boy and Brandywine are great slicers. Cherry tomatoes are excellent for snacking and salads. And those looking for fast results may want to select one of the early ripening varieties like Early Girl, Fourth of July, and Subarctic.
Consider disease resistance when making your selection. The All America Selections winners Celebrity and Big Beef are resistant to several tomato diseases. Others like Mountain Merit, Mr. Stripy, and Galahad have shown resistance to late blight.
Check with your local Extension Service for a list of tomato varieties suitable for your location. You’ll find one best suited to your climate and the length of your growing season.
Take a close look at the plant tags, seed packets, and garden catalog descriptions. You will find lots of helpful information on these. Understanding some of the terms and abbreviations will help you make your selection.
- D – Determinate: These tomatoes grow a certain size and stop. All the fruit tends to ripen in a relatively short period of time. Great for containers, hanging baskets, or training on short supports or in towers.
- I – Indeterminate: These tomatoes continue to grow, flower, and produce new fruit throughout the season. Many gardeners pinch out the growing tips about a month before the average first fall frost. This stops the plants from growing new flowers and fruit that are unlikely to ripen before the killing frost. You’ll need tall stakes and big towers to keep these large plants upright.
- Compact tomatoes: Smaller plants that don’t need staking and are the perfect size for tabletop containers, window boxes, and some work well in hanging baskets.
- Disease resistance: V (Verticillium), F (Fusarium), FF (Fusarium Races 1 & 2), FFF (Fusarium Races 1,2 & 3), N (Nematode), T (Tobacco Mosaic Virus), LB (Late Blight) EB (Early Blight) St (Stemphylium gray leaf spot), A (Alternaria stem canker), C (Cladosporium Leaf Mold), TSWV (Tomato Spotted Wilt Virus). I included most of the common ones - Johnny’s has a comprehensive list of abbreviations for all veggies.
- AAS - All-America Selections: Plants with this designation have been tested nationally and selected for their suitability for home gardens. Winners have improved flavor, growth habit, disease resistance or other quality that makes them better than varieties that are already on the market
- H – Heirloom: Most agree an heirloom is a plant variety that has been around for more than 50 years, preserved and kept true to its parentage.
- Hybrids: These are the result of breeding programs and selected for uniform growth, fruit production, and other desirable characteristics.
- Days to Harvest: The average number of days from planting until you pick your first ripe tomato. You may be harvesting sooner in a hot summer and later during a cooler growing season.
Planting Seeds
Grow your own tomatoes from seed for the greatest selection. You can plant them directly in the garden if your growing season (frost-free days) is long enough and weather conditions are right for the seeds to sprout, plants to grow, and produce fruit. Starting the seeds indoors allows you to shorten the time to harvest. Start seeds indoors about 6 weeks before tomato plants can be moved into the garden.
Purchase peat pellets, pots, or other seed starting containers. Save money by cleaning and reusing old containers. Just soak them in a one-part bleach-nine parts water solution for 10 minutes then rinse with clear water. Convert yogurt, cottage cheese or fast food containers into seed starting vessels. Just punch drainage holes in the bottom. Or fold and roll newspaper into biodegradable seed starting pots.
Fill whatever container you choose with a well-drained potting mix or a sterile seed starting mix. Plant two tomato seeds in each pot one quarter an inch deep. Gently water to remove any air pockets and help the seed settle in place. Cover the container with plastic or one of the pre-fab domes to help conserve heat, humidity, and moisture. This speeds germination and minimizes the need to water. Move the container to a warm location. Tomatoes like most seeds need warm soil but no light to sprout.
Remove the cover and move the container to a warm sunny window or under artificial lights as soon as any green appears. South- or west-facing windows are usually the brightest but artificial lights give the best results. Keep the lights 4 to 6 inches above the top of the plants and on for 14 to 16 hours each day. Raise the lights as plants grow to maintain this spacing.
If two seeds sprout in one pot remove the weaker one after two true leaves, these look like tomato leaves, appear. Just snip the weaker one off at ground level and add it to the compost pile.
Continue to water your young tomato plants keeping the planting mix consistently moist but not wet. Fertilize every two weeks with a half-strength solution of a liquid fertilizer labeled for this purpose.
Prepare Tomatoes for the Garden
Give garden transplants a helping hand as they move from the warm humid greenhouse or inside your home to the harsh outdoors. Start the process about one to two weeks prior to the recommended outdoor planting date. Move the transplants to a sheltered location near the warmth of your home, in the shade of a tree, or other protected spot.
Stop fertilizing and continue watering as needed. Move your tomato plants into the sunlight for one hour the first day. Increase this time by an hour each day until the plants are ready for their permanent full sun locations. Don’t rush the process – or your plants will be sunburned.
Move the plants indoors or cover them when temperatures drop or frost is in the forecast. I use floating row covers to reduce my workload while helping the plants transition to the outdoors. These fabrics allow air, light, and water through while trapping heat around the plants and protecting them from frost.
Prepare the Garden Soil for Planting
While you harden off your tomato plants make sure the garden soil is properly prepared. Make sure the area receives full sun and call 811 three days before putting the first shovel in the ground. This free service contacts all the appropriate companies who will mark the location of their underground utilities in your designated work area. This reduces the danger and inconvenience of accidentally knocking out power, cable, or other utilities while creating a beautiful landscape and productive garden.
One way to improve your soil is to incorporate several inches of compost, aged manure, and other organic matter into the top eight to twelve inches of soil prior to planting. These materials improve the drainage of clay soil or increase the water-holding ability of sandy soils.
This is also a good time to add Milorganite a slow-release low nitrogen fertilizer. It provides plants with a constant supply of small amounts of nutrients over several months. Better for your plants and less work for you. No need to spend time mixing fertilize with water and applying weekly. Then fertilizer with Milorganite again midseason as needed. You’ll find the application rates on the back of the bag or here.
You can also create your own garden soil using the lasagna method. Layer compostable materials like garden trimmings and fall leaves with compost or topsoil. Add MIlorganite to feed the plants and speed decomposition. This is a quick way to build quality “soil” for growing a garden. You can plant as soon as your garden is created or start in fall when the ingredients are readily available.
Raised beds are another way to skip amending poor soil. Just fill it with a quality planting mix or create your own with the lasagna gardening method. Just make sure the planting mix purchased to fill your raised bed is better than the existing soil. Here are some tips to help if you opt to use raised bed gardens.
Strawbale gardens are raised beds, planting mix, and a container all in a straw bale. Condition the bale for several weeks with water and Milorganite to create compost in the center for planting. Many gardeners find it a great small space and accessible way to garden.
Once the soil is prepared, wait for the air and soil to warm before planting your tomatoes. Planting too early when the soil is still cool and the nights are chilly can stress the plant and delay your harvest.
Planting Tomato Plants
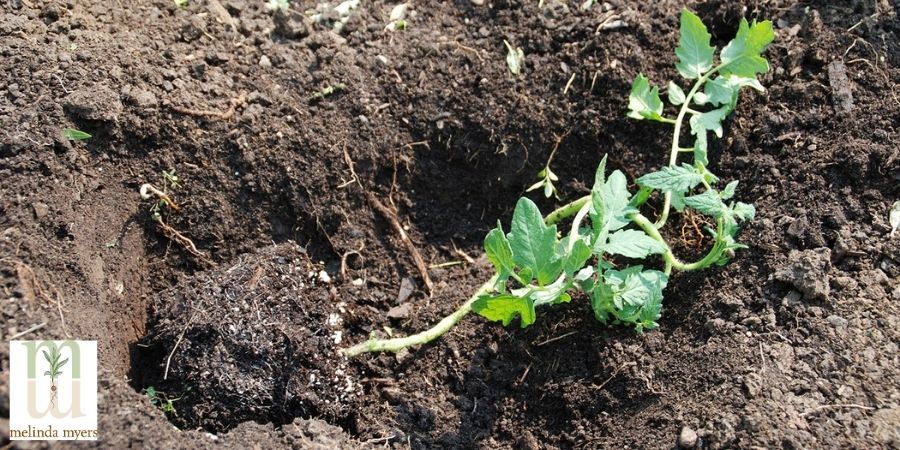
Bigger isn’t always better when it comes to tomato transplants. Plant long leggy transplants a few inches deeper than they were growing in their container. Remove the lower leaves that would otherwise be buried in the soil when planting deep. Roots will form all along the buried stem.
Better yet, plant them in a shallow trench. Trench tomatoes by digging a shallow trench about 3 to 4 inches deep. Remove the lower leaves and lay the plant on its side in the hole. Carefully bend the stem, so the remaining upper leaves are above the soil. Fill the trench with soil and water. Just like planting deeper, roots form along the stems producing a more robust root system.
Space plants 24” to 36” apart depending on the variety you grow. Check the seed packet or plant tag for specific spacing information.
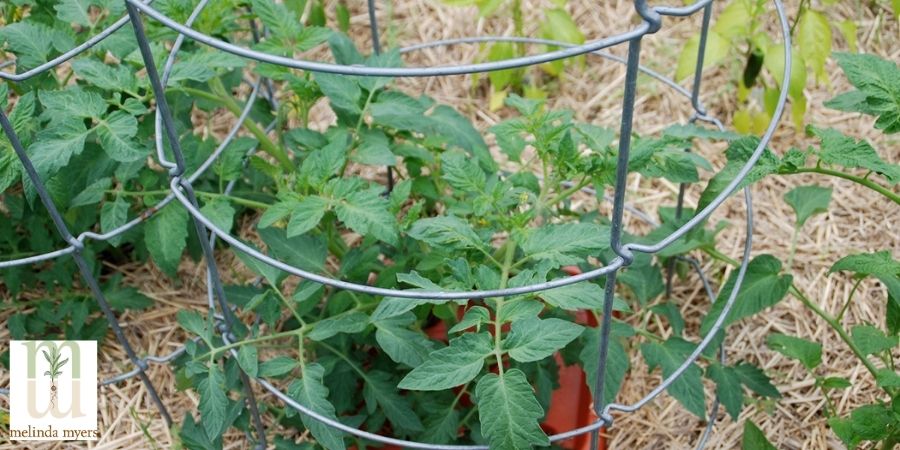
Install stakes or cages at planting to avoid damaging roots. You’ll also find it easier to place a tomato cage over a small transplant than trying to shove an established plant into a tomato tower.
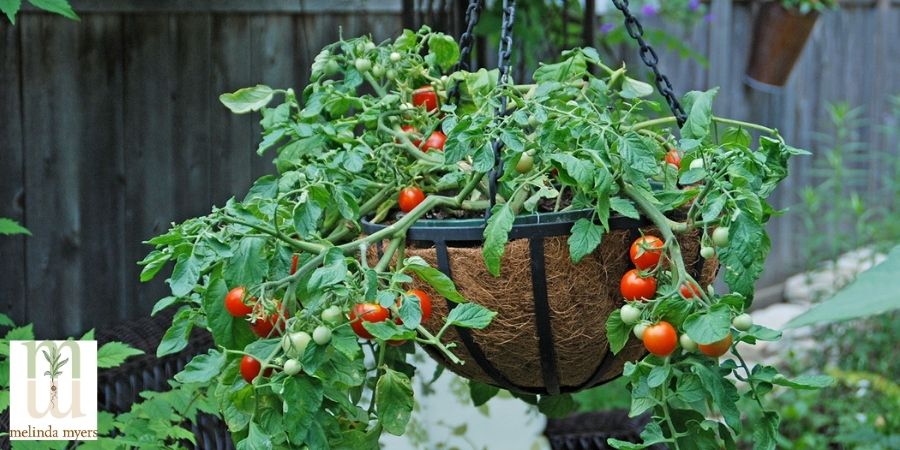
Growing Tomatoes in Pots
All you need is a quality potting mix, fertilizer, plants, and a container with drainage holes. Consider using a compact or determinate variety best suited for a container. You can grow larger indeterminate tomatoes in containers but will need to include some type of sturdy support. You can craft your own or purchase one of the many containers with built-in trellis setups.
Use at least a 2 to 3-gallon pot for small compact tomatoes varieties and a 5-gallon or larger container for bigger tomatoes. I have had great success repurposing 5-gallon work or food-grade buckets just none that contained harsh chemicals. Drill a few holes in the bottom for drainage and you are set. Some research suggests growing in a pot that is at least 14’ preferably 20” wide will yield greater results.
Fill the container with potting mix. Add Milorganite fertilizer at planting for better results with less effort. The amount of Milorganite needed is based on the size of the container. You only need 4 tablespoons of Milorganite for a 2-gallon pot and 2/3 a cup for a 5-gallon container.
Milorganite provides small amounts of nutrients throughout most of the season. Sprinkle the second application of Milorganite on the soil surface and work it into the top inch of soil 6 to 8 weeks later.
Plant tall tomato transplants a few inches deeper than they were growing in their container. Just remove the lowest leaves that would otherwise be buried in the soil. Cover with soil and water. This is also a good time to install any stakes, trellises, or cages to support taller varieties.
Check containers daily and water thoroughly as needed. Self-watering pots need less frequent watering, allowing busy gardeners and travelers the opportunity to grow plants in pots with minimal care.
Tomato Trellises, Stakes, and Towers
Train your tomato to a trellis, stake, or in a tomato cage to reduce insect and disease problems and make harvesting easier. The type of tomato and your schedule will help determine the training system that works best for you.
Determinate tomatoes (D on the tag) grow a certain height and stop. They work well in towers, containers, or even hanging baskets. Indeterminate tomatoes, labeled with an I on the tag, keep growing taller, producing more flowers and fruit until the end of the growing season. These do best when grown on tall sturdy stakes or extra tall and strong towers.
Towering tomatoes is easy. Simply place the tower over the tomatoes at planting. Tomatoes grown in towers produce a larger, but later harvest than staked tomato plants.
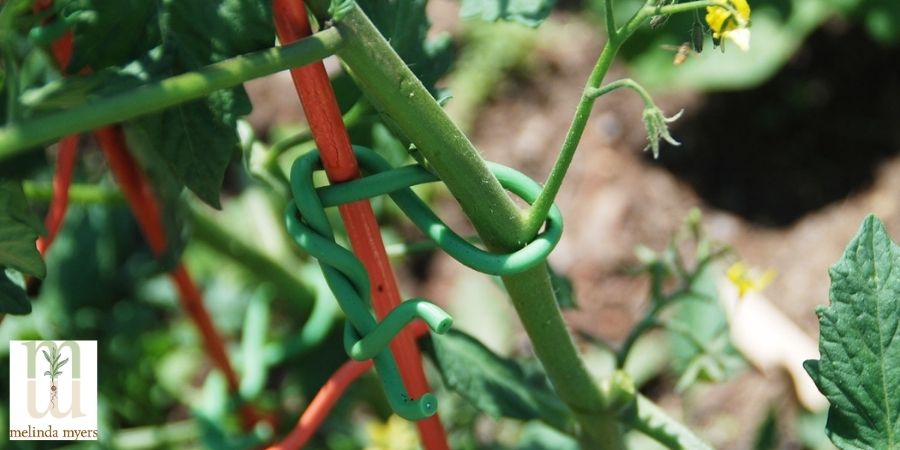
Allow a bit more time if you decide to stake your plants. Place the stake in the ground at planting. Be careful not to injure the roots. Staked tomatoes produce the earliest but smallest harvest.
As the plants begin to grow select one or two main stems to secure to the stake. Use cloth strips, twine, or other soft ties to loosely attach these stems to the stake. Continue tying the stems to the stake as the plants grow. Check several times a week and remove all side branches and suckers that develop between the main stem and leaves. Regular pruning is needed to restrict the size of the plant to fit onto the stake.
Caring for Tomatoes
Check new plantings every few days and water often enough to keep the developing root system moist. Gradually extend the time between watering as plants become established. This encourages deep roots that are more drought tolerant. Water established plants thoroughly whenever the top few inches of soil are crumbly and just slightly moist.
Remember to check containers daily. Water these thoroughly whenever the top few inches of soil just begin to dry.
Mulch the soil with evergreen needles, shredded leaves, or other organic mulch to keep the soil consistently moist and suppress weeds. This includes those growing in containers. Consistent soil moisture encourages more flowering and fruiting while reducing the risk of blossom end rot, cracking, and misshapen fruit.
Make a second application of Milorganite 6 to 8 weeks after planting. This provides nutrients the plants need for a bountiful harvest.
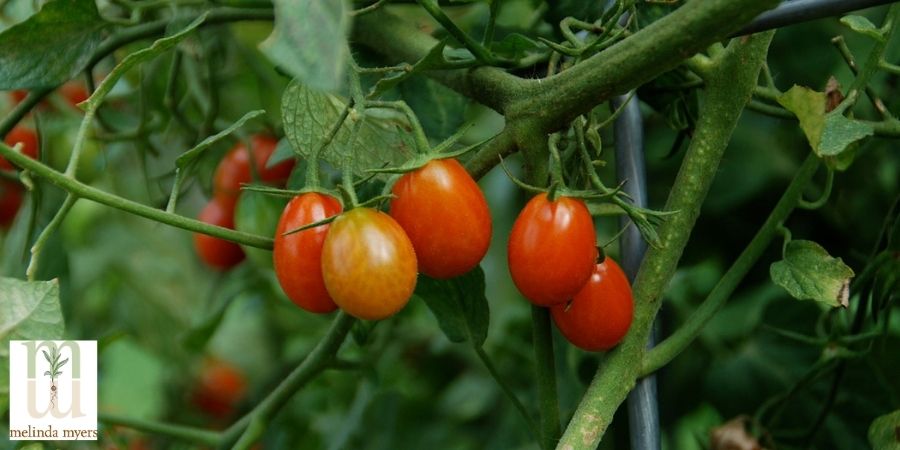
Pick tomatoes when fully colored. Leave them on the plant for an extra 5 or 6 days for even better flavor. Unfortunately, the animals often move in and feast on the ripening fruit. In this case, you may need to finish ripening tomatoes indoors. You can pick any tomatoes that are starting to show color and finish ripening them indoors when battling critters or when frost is in the forecast. The blossom end should be greenish-white or starting to color up. Store your green tomatoes in a cool (60 to 65 degrees) location to extend their storage life.
Spread out the tomatoes on heavy paper or wrap them individually in newspaper so the fruit does not touch. They’ll ripen over the next few weeks. You can speed up the process by moving a few tomatoes to a bright warm location a few days before they're needed.
Once you taste that first red ripe tomato, you’ll be looking for more sunny spots for containers or to expand your garden.