How to Know if Your Seeds Are Still Good
- Gardening Expert and Host of Growing a Greener World®March 2, 2024
Gardeners who start plants from seed often wonder about all the unused seeds they have left over from previous seasons, especially when they’ve been hanging on to seed packets that are a few years old. I get it. It’s hard to let go of a perfectly good seed.
But how do you know if that seed really is still viable - the term used to describe a seed’s ability to germinate and grow into a plant? Well, just like us, seeds are only in their prime for so long. Seed viability is influenced by several factors, including the seed's age, storage conditions, and the inherent characteristics of the seed variety.
Understanding whether your seeds can still sprout is crucial for garden planning and can save you a lot of time and money from rebuying seeds you already have.
When To Consider Doing a Viability Test
Plenty of information exists about the general viability of seed species, so start with a baseline threshold age for whatever seed you are considering.
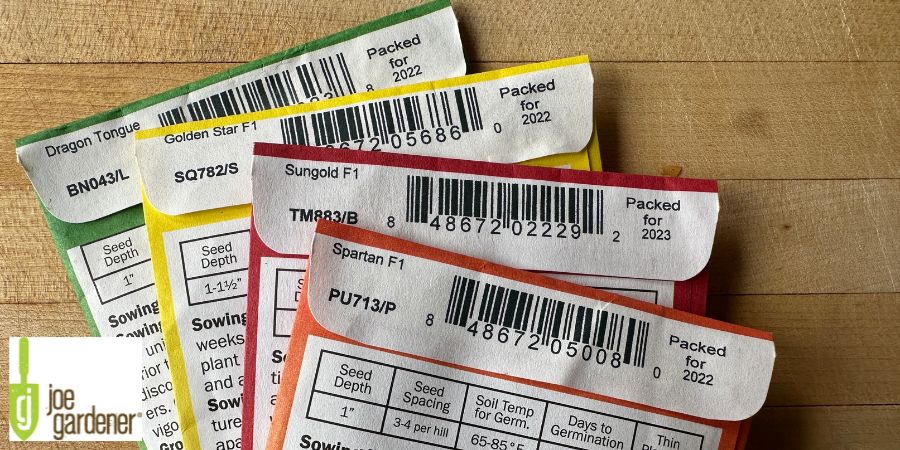
One key date to know is when the seed was packaged for sale. Usually, the term is in fine print somewhere on the packet. It will reference a year. That’s your starting point.
As you go through your seed inventory in subsequent seasons, note the years since those seeds were packed for sale. The older they are, the more it makes sense to do a viability test.
Ideally, tests for viability should be done a few weeks before the intended planting date, allowing enough time to buy new seeds if necessary. Additionally, testing before the end of the storage season can help determine which seeds can be carried over to the next year and which should be replaced.
So, let’s explore two simple ways to determine if your seeds are still good enough to sprout and plant by doing a seed viability test.
Two Options For Testing Viability of Seeds
There are two primary methods for testing seed viability: the water test and the towel test. The water test, suitable for larger seeds, involves placing seeds in water and observing whether they sink or float. Typically, viable seeds will sink to the bottom while the water test is about as easy and quick as it gets, it’s not as reliable as the towel test.
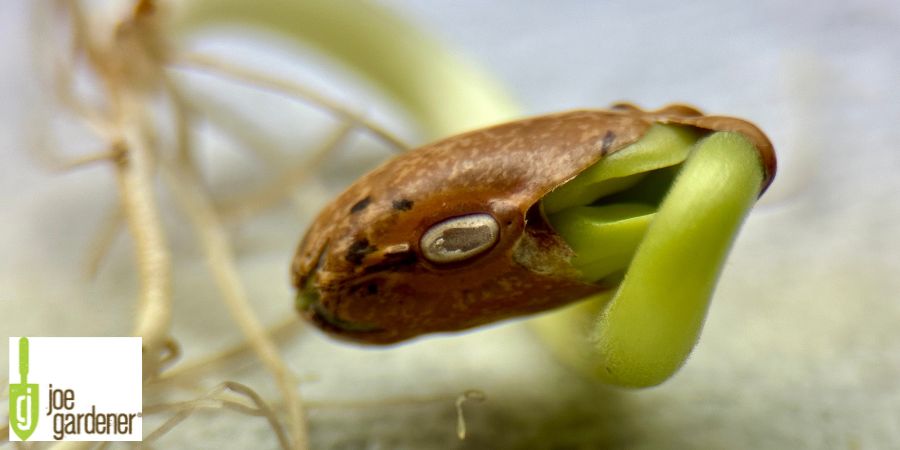
The towel test is also more versatile and can be used for seeds of all sizes. This method involves moistening a couple of layers of paper towel, placing seeds on it, then folding and keeping it in a warm place. This, too, is an easy test to set up. However, the results just take longer because germination rates vary from a few days to a couple of weeks.
The Towel Test: 5 Simple Steps
- Prepare your materials: You'll need a couple of layers of paper towel, water, a plastic bag or container, and the seeds you wish to test.
- Moisten the paper towel: It should be damp but not dripping wet.
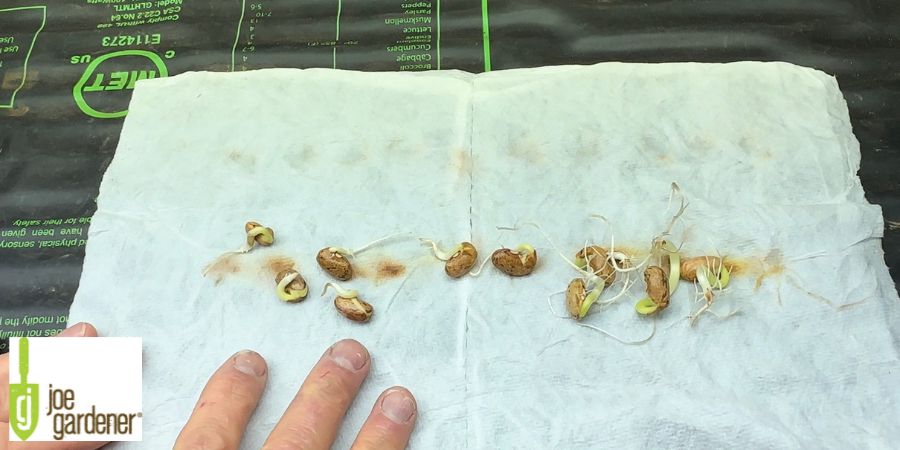
- Place 10 seeds on the towel: Space them out evenly.
- Fold and store: Place the folded towel with seeds into the plastic bag or container and store it in a warm, dark place. Be sure to write the date you started on the bag.
- Monitor germination: Check the seeds regularly for signs of sprouting.
Now What to Do With Your New Seeds
After the test period, calculate the percentage of seeds that have germinated. This will give you an indication of the overall viability of your seed batch. A high germination rate suggests that the seeds are still good and can be used for planting. Conversely, a low germination rate may indicate that it's time to refresh your seed stock.
And here’s an often overlooked reminder to not throw out the seeds that germinated during the viability test. Those seeds are ready to grow and can be planted directly into soil or starter pots. But do be sure to handle them with care to avoid damaging the tender shoots and roots.
Special Considerations for Certain Seeds
Some seeds, particularly those with hard coats or dormancy requirements, may need special treatment such as stratification (cold treatment) or scarification (scratching the surface) to encourage germination. These pre-treatment steps mimic natural conditions and can significantly improve germination rates. Seed packets will often (but not always) mention these special conditions. When in doubt, it’s an easy online search.
Conclusion
Incorporating these practices into your seed-starting routine will improve your success rate and certainly add an important skill to your becoming a better, smarter, and more confident seed starter and gardener.