How to Propagate Native Plants
- horticulturist and gardening expertSeptember 23, 2023
Our budgets don’t always expand at the same rate as the gardens we want to create. Help stretch your garden budget by starting new native perennial plants from seeds, cuttings, and division.
A packet of seeds contains the potential to grow lots of seedlings for less than the price of an individual plant. It does, however, require more time and effort on your part, but watching the seeds sprout, grow, mature, and eventually flower makes it worthwhile.
When purchasing seeds, look for those collected from plants growing in your region. These will be the best adapted to your climate. Then check the seed packet for planting information.
Some seeds need a cold period called stratification to germinate. Some of these need moist conditions during the cold treatment while others can be stratified dry. I find an easy way to accomplish this is to plant the seeds outside in the fall so they receive the needed cold. Otherwise, place those that need moist stratification in a container with an equal or greater volume of damp vermiculite, perlite, or peat moss for storing. Just store those that need dry stratification in an airtight container in a spare refrigerator to provide the needed cold indoors. The number of cold days needed varies with the particular seed but is usually between 30 and 90 days. Again, check the seed packet or the seed catalog for treatment details.
Those with hard seed coats need to be scarified or the surface scratched to allow the seed to absorb water and break dormancy. Rubbing the seeds with sandpaper before planting is an easy way to do this.
Many seed providers prepare the seeds for you so they are ready to plant indoors or outside at the time listed on the seed packet for your location. Neil Diboll owner of Prairie Nursery provides detailed information on starting various native prairie plants from seeds.
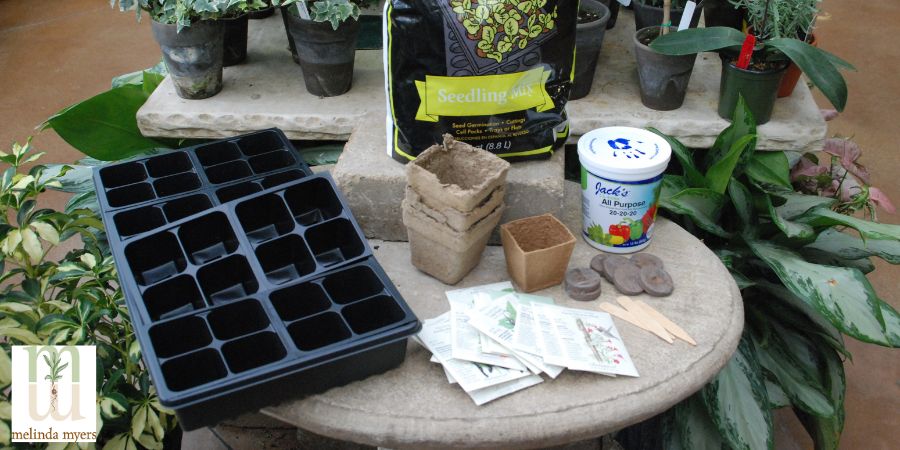
Once seeds receive the needed treatment you can start them indoors like you would other seeds. Check the seed packet for the proper depth and timing.
Use small containers or flats filled with moist seed starting mix. Starting plants in biodegradable pots makes the transition from container to the garden easier for any plant but especially those that do not tolerate having their roots disturbed.
Sprinkle the seeds over the soil surface and cover as recommended, no more than twice the seed diameter, with additional seed starting mix. Keep the soil moist and the containers in a warm location generally between 70° and 75° F. Move to a sunny window or under lights as soon as any green appears. Move seedlings that were started in flats into individual containers once they have several sets of leaves.
Harden off seedlings starting several weeks before planting them outdoors. Gradually introduce the plants to direct sunlight and other outdoor growing conditions once the danger of frost has passed.
Winter Seed Sowing in Milk Jugs and Containers
Save space by sprouting seeds outdoors then moving the seedlings to their home in the garden. Let’s start with a fun technique I have had great success using to start both native and cultivated plants. Winter sowing in milk jugs eliminates the need for cold frames, greenhouses, and lights.
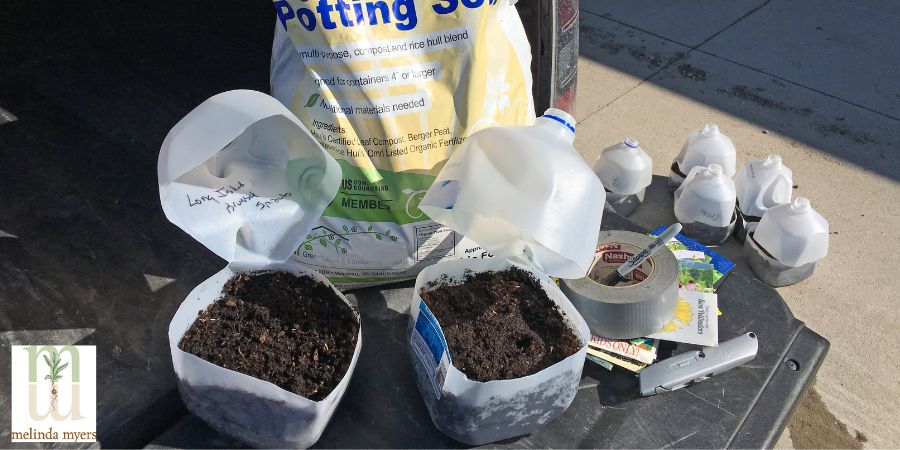
Cut the gallon milk jug about 3 to 4” above the bottom, leaving the area by the handle attached. Add four or more small drainage holes in the bottom of the jug and fill with a damp potting mix. Plant seeds at the recommended depth and spacing or even a bit closer. One gardener fills her jugs with short sections of cardboard cylinders from the center of toilet paper or paper towels to make transplanting easier. Once planted, gently water until the excess runs out the bottom of the container.
Label the inside and outside of the jug with a permanent marker. Close the jug and seal it shut with duct tape. Remove the cap and set your milk jug in a sunny location outdoors where rain and snow can reach it.
Seed starting dates vary based on the growing climate, individual gardeners, and the seeds you are planting. You’ll find a variety of planting recommendations on the internet. Plant native perennials during the winter so they receive the needed days of cold treatment. Make a few notes on when you planted certain seeds to help you fine-tune your planting schedule in the future.
You can also plant the seeds in containers in fall and move them outdoors where they will receive rain or snow for winter. Cover the planted containers with hardware cloth or chicken wire and secure the ends to prevent animals from digging and disturbing the seeds over winter.
Starting Native Plants from Cuttings
Another way to expand your native plant collection is with leaf-stem cuttings. These will be exact replicates of the parent plant. You may have used this technique for houseplants and heirloom annuals in the past.
Use a bypass pruner or sharp knife to take 3 to 4” cuttings from healthy stems. I like to make my cutting right above a set of healthy leaves so the remainder of the stem looks nice. Remove the lower leaves, any buds, and flowers that may be on that cutting.
If you've had trouble rooting cuttings in the past, try using a rooting hormone. These contain fungicides to fight disease and hormones to encourage root development. Dip the cut end into the rooting hormone if needed and stick it in vermiculite, perlite, or well-drained potting mix to root.
You can root several cuttings in the same container or flat. Gently water and loosely cover with a clear plastic tent or ventilated dome to increase humidity around the cuttings without encouraging rot.
Place the containers in a bright location out of direct sunlight. Roots usually form in several weeks. Just give the cutting a gentle tug to see if it has developed roots. Once rooted, move them to their own container if needed, to continue growing large enough to add to the garden.
You can also start native trees and shrubs from cuttings. These are a bit trickier as plant species, age of the plant, and timing of when to take cuttings is critical to success.
Some plants do best with softwood cuttings taken from new growth in the spring. Take 3 to 5” cuttings with two nodes (where leaves grow) and remove the lower leaves. Use the top 4 to 6” of partially mature stems (stems starting to turn hard and brown) for semi-hardwood cuttings and leave the leaves intact. Take hardwood cuttings from mature, hard, stems 2 to 30” long and remove all the leaves. Dip cut ends in rooting hormone before sticking the cutting in a rooting medium. Moisten and loosely cover to increase the humidity around the cuttings while they root.
Once rooted, you can move them into individual containers as needed and grow in a brightly lit location or under artificial lights. Gradually harden off the plants before moving them outdoors into the landscape.
Start Native Plants by Division
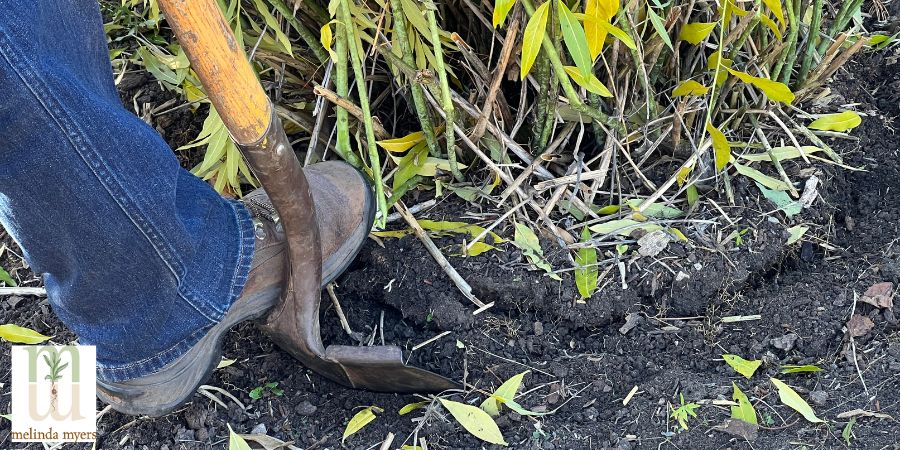
A fast way to start new native plants is by dividing large established herbaceous plants into several smaller plants. The best time to divide spring blooming native perennials is in fall, fall bloomers in spring, and summer blooming perennials in either spring or fall. But most gardeners have found the best time to divide is when you have the time. Just remove any flowers or seed heads when transplanting plants at other than the preferred time. The key to success, not matter when you dig and divide is providing post-transplant care.
Always start with a call to 811 at least 3 business days before you start digging. This free service contacts the utility companies that will mark the location of their underground utilities in your work area. This reduces the risk of injury that can occur if you contact one of these. It also saves you money. If you damage an underground utility and have not called 811 in advance you are responsible for the repairs. I’m sure you are like me and would much rather spend our money on seeds and plants not utility repair.
Once the work location has been marked you can begin digging. I like to use a sharp shovel or spade to lift the perennial, roots and all, out of the soil. Next, I cut this into smaller sections using a weed or linoleum knife or drywall saw. A reciprocating saw works great for those plants with dense hard to divide root balls.