Creating a Straw Bale Garden
- horticulturist and gardening expertMay 10, 2025
Create a raised bed garden with a bale of straw. It’s a great way to add productive garden space, create a contained garden and raise your planting bed for easier access without investing in expensive structures. This technique allows you to create raised bed gardens on a patio, lawn or any area with poor compacted soil. Straw bale gardening also eliminates weeding and the need for digging providing a big advantage if you have compacted and rocky soil. Once you harvest, your straw bale can be used as mulch adding organic matter and nutrients to the soil.
Straw bale gardening has been around for centuries, but thanks to Joel Karsten’s book “Straw Bale Gardens” it has gained new popularity. All that is needed are a few straw bales, fertilizer, a bit of compost and time to condition, plant and water the garden.
The Type of Straw Bale to Use
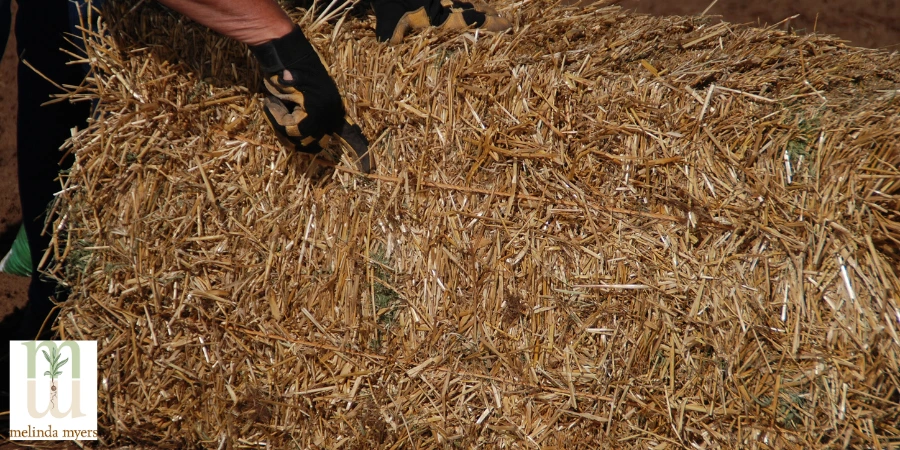
You can use straw or hay bales of alfalfa, wheat, oats, rye, or other cereal grain. Opt for straw bales if possible as they have fewer weeds and grass seeds than hay bales. Select a tight bale held together by several strands of baling twine, preferably made of biodegradable materials such as jute or sisal. Purchase your bales several weeks prior to your planting date.
Find a Permanent Location
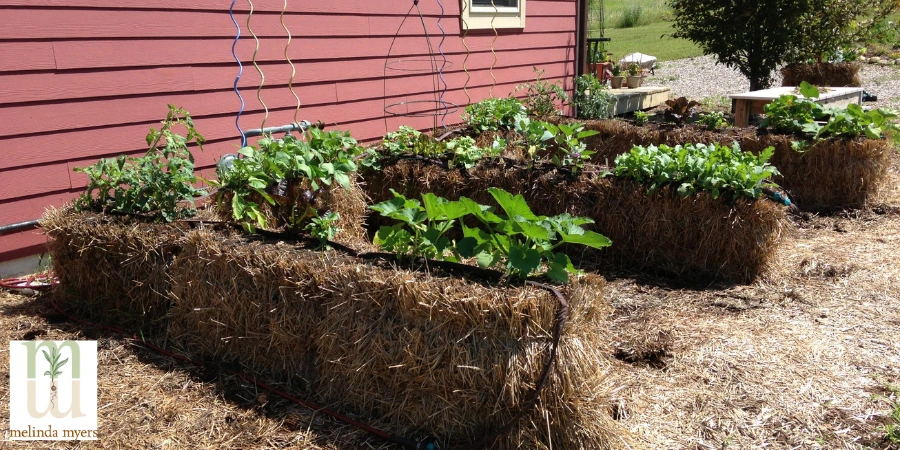
Place your straw bale garden in a convenient location with easy access to water. Set the bales in their permanent location with the cut sides up and twine parallel to the ground. Once you start the conditioning process, the bales will be very heavy and hard to move.
Some gardeners fill raised bed structures with straw bales instead of a raised bed planting mix. The structures dress up the process which may be important in some neighborhoods. They also hold the bales in place as they begin to decompose.
Prepare the Straw Bales for Planting
Once the bales are in place you are ready to start the conditioning process. Conditioning involves watering and fertilization to start the composting process needed to support plant growth. You will find various schedules, but I opted to follow the method outlined in Karsten’s book Straw Bale Gardens. This is a ten-day process so make sure to set time aside or enlist help completing this phase. Consider using soaker hoses or drip irrigation to make it easier to thoroughly moisten the bale every day.
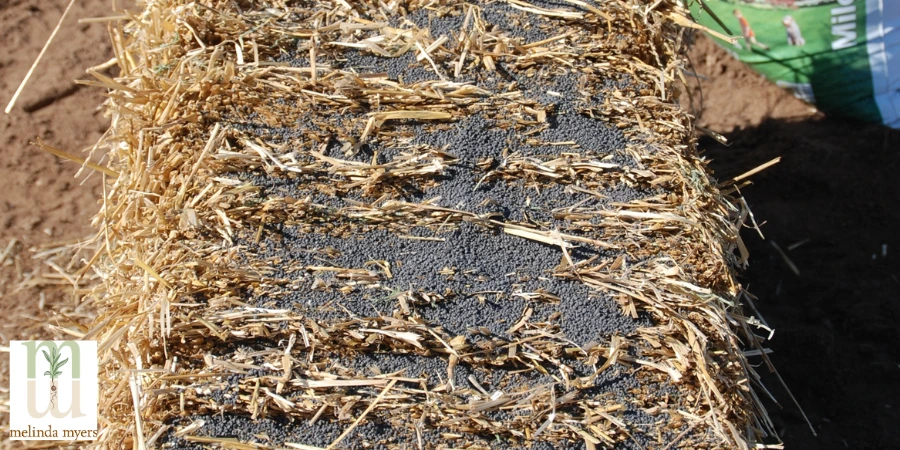
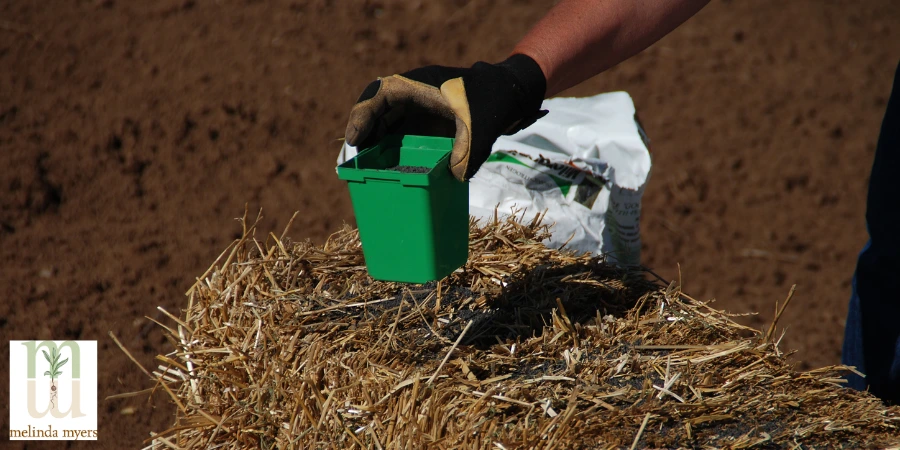
- Day One - spread fertilizer over the top of the bale. Use a ½ cup of a complete garden fertilizer or three cups of an organic fertilizer like Milorganite®. Then completely moisten the bale. The organic fertilizer feeds the microorganisms that help decompose the straw into a nutrient rich planting medium. Thoroughly moisten the bale.
- Day Two – Add water only. Thoroughly moisten the bale.
- Day Three - Spread fertilizer over the top of the bale. Use a ½ cup of a complete garden fertilizer or three cups of Milorganite. Then completely moisten the bale.
- Day Four - Add water only. Thoroughly moisten the bale.
- Day Five - Spread fertilizer over the top of the bale. Use a ½ cup of a complete garden fertilizer or three cups of Milorganite. Then completely moisten the bale.
- Day Six - Add water only. Thoroughly moisten the bale.
- Day Seven - Spread half the amount of fertilizer over the top of the bale. This is ¼ cup of a complete fertilizer or 1 ½ cups of Milorganite fertilizer. Moisten the bale.
- Day Eight - Add water only. Thoroughly moisten the bale.
- Day Nine - Spread half the amount of fertilizer over the top of the bale. This is ¼ cup of a complete fertilizer or 1 ½ cups of Milorganite fertilizer. Moisten the bale.
- Day Ten – Add one cup of a complete fertilizer like 10-10-10 or three cups of Milorganite fertilizer. Moisten and this completes the conditioning process.
Planting Your Straw Bale Garden
Once conditioned, check the temperature and decomposition of your bale before planting. If you used a synthetic fertilizer, your bale should be ready to plant. When using an organic fertilizer, you will need to wait an extra 5 days, as a bit more time is needed for the decomposition. No matter the fertilizer used, check the temperature of the inside of the bale before planting. It should feel like warm bath water at 99°F or cooler. If it is hotter than that, wait a bit longer and check the temperature again before planting.
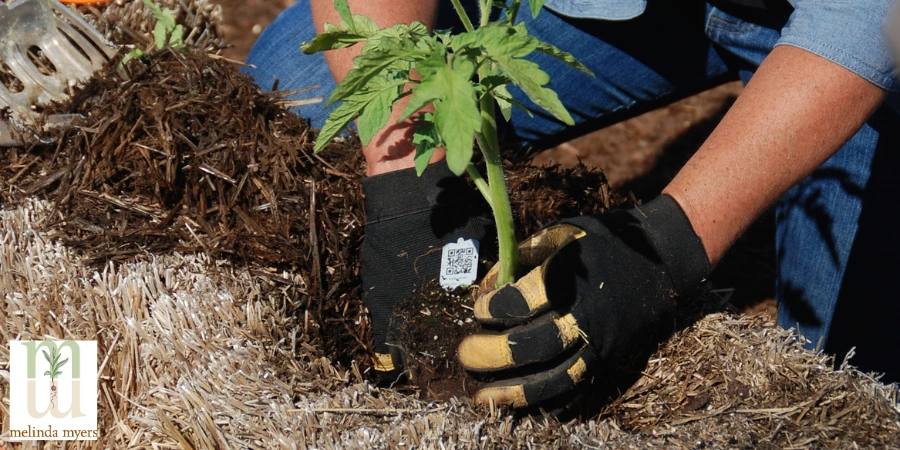
You can grow any vegetable and even flowers in your straw bale garden. When adding transplants, use a trowel to pry open a hole in the bale. Place the plant roots in the hole and cover the them with potting mix or compost. In general, you can plant 1 or 2 tomatoes, 2 peppers, 1 squash or melon plants and 2 cucumbers in a bale.
Just like any garden, you will need to support tall plants. Use T-posts or other tall supports secured in the soil at the end of the bales. Run wire, twine or strings at 10-inch spacing intervals between the posts to create support for tall and vining plants like pole beans, peas and tomatoes.
You will need to create a planting bed when starting plants from seeds in your straw bale garden. Cover the bale with a one-to-two inch thick layer of planting mix. Follow the directions on seed packet for proper planting depth and spacing.
Watering Your Straw Bale Garden
Regular watering is critical for success with this method. Soaker hoses or drip irrigation make this an easier task. You can also use gallon milk jugs with holes in the bottom or inverted two-liter soda bottles placed near the base of each plant to provide water where it is needed.

Check the soil moisture daily and water enough to moisten the area around the plants. Don’t let this area dry out. Watering frequency is influenced by the types of plants you are growing and the temperature. The outside of the bale may dry out but the internal portion where the plants are growing needs to stay moist but not excessively wet.
Fertilizing Your Straw Bale Garden
Let your plants guide your fertilization. If plants are pale green, stunted or not producing as you like consider giving your garden a nutrient boost. Sprinkle Milorganite over the soil surface once a month or as needed throughout the growing season.
Ongoing Care
You may occasionally find a weed or two sprouting out of the bale, but these can be easily removed by hand. You should experience fewer diseases if plants are receiving sufficient sunlight and water and are properly spaced and supported. Since you are starting with a fresh growing mix you reduce the risk of soil borne diseases.
Regularly check plants for insect pests. Healthy plants are better able to tolerate damage, and many beneficial insects and songbirds help manage insect pests in any garden. If intervention is needed, try removing the pests by hand, knocking them into a can of soapy water, or other eco-friendly control options.
Harvest vegetables when they are full size, brightly colored, and at their peak of flavor and have the greatest nutritional value. Regular harvesting will encourage plants to keep producing.
As you can see, there are many benefits to straw bale gardening. Just like any technique you should match it to your gardening style and landscape design. Depending on where you garden, you may need to dress things up a bit. Try planting flowers or add a decorative screen in front of the bales if this is a concern.
You will need to water more often than an in-ground garden and that is why soaker hoses, drip irrigation or passive drip irrigation is helpful. Don’t worry about mushroom that may appear on the bales. You may opt to remove these to prevent kids and pets from taking a taste.
Follow these steps and you’ll be well on your way to growing a productive straw bale garden to enjoy throughout the season.