How to Create a Successful Container Garden
- horticulturist and gardening expertJune 13, 2026
Add color and seasonal interest on patios, decks, balconies, and at your front entrance with container gardens. Set containers in garden beds to add vertical interest, place pots of edible plants nearby for convenient picking, and include pollinator-friendly plants to attract and support pollinators for you to enjoy.
Container gardening allows just about everyone an opportunity to garden. No matter your level of expertise, beginner or experienced, you can boost your success by implementing a few simple strategies and enlisting the help of some maintenance-saving devices.
Selecting the Container
Consider both function and beauty when selecting your containers. Make sure the container has drainage holes, helping prevent waterlogged soils that can lead to root rot. Even if you were able to provide the perfect amount of water throughout the growing season, nature has other plans. Frequent rainstorms and prolonged wet weather can quickly fill a container without drainage holes.

You can add drainage holes to those containers that lack them. I use a drill and ¼” drill bit to add several needed drainage holes in the bottom of the pot. Some pots contain plugs that can easily be knocked out of place, creating the needed drainage.
If your container lacks drainage holes and it is too precious or delicate to add them, try double potting. Plant your garden in a slightly smaller pot that does have drainage holes. Place a few stones in the bottom of the decorative pot and set the smaller container inside the larger pot on top of the stones. Excess water collects in the stones below the inner pot. Just check occasionally and empty the excess water before it reaches the bottom of the inner pot.
And don’t use rocks at the bottom inside the pot you are planting to provide drainage. This doesn’t solve the problem. Each time you water or it rains the excess water collects in the stones. Eventually, the water level rises above the stones, the soil becomes waterlogged, and plants begin to decline and eventually die.
Extend the time between watering with self-watering containers. Just keep water in the reservoir so the soil can consistently absorb the water your plants need. Select self-watering pots with weep holes located at the top of the water reservoir. The weep hole allows excess water to escape rather over saturating the soil.
The Right Size Pot
The size of the pot influences the number of plants you can include as well as how often you’ll need to water. Since you provide the growing medium, water, and fertilizer, you can plant them closer together than you would in the garden. The more plants squeezed into the container, the more water, fertilizer, and trimming will be needed. I like to leave a bit of space between plants when creating my container gardens. In just a few weeks, they fill in and look lush. Others like to pack in the plants from the start.
Consider starting with 3 or 4 small plants for a 10 to 12-inch pot, 4 to 6 for a 14-inch container, and 6 to 8 for a 16 to 20-inch pot. You will need fewer plants when including one or more medium or large plants in the mix.
Most vegetables, including smaller varieties of tomatoes, thrive in 2-to-3-gallon pots. Grow larger tomatoes in a 5-gallon or larger container and preferable one that is 14” to 20” wide for the biggest harvest. Growing individual vegetable plants in their own container yields the most produce. I like to mix flowers and herbs with vegetable plants for an attractive display even though I will be harvesting fewer veggies. Achieve the best of both by growing individual vegetable plants in their own container and set them among your flowering pots to boost the overall beauty of your container garden display.
Consider the weight, porosity, and weather resistance of the material when selecting a container
Porous materials like terra cotta dry out quickly and are perfect for wetter climates and gardeners who tend to overwater. These do not tolerate freezing temperatures and need to be stored indoors where winters are cold.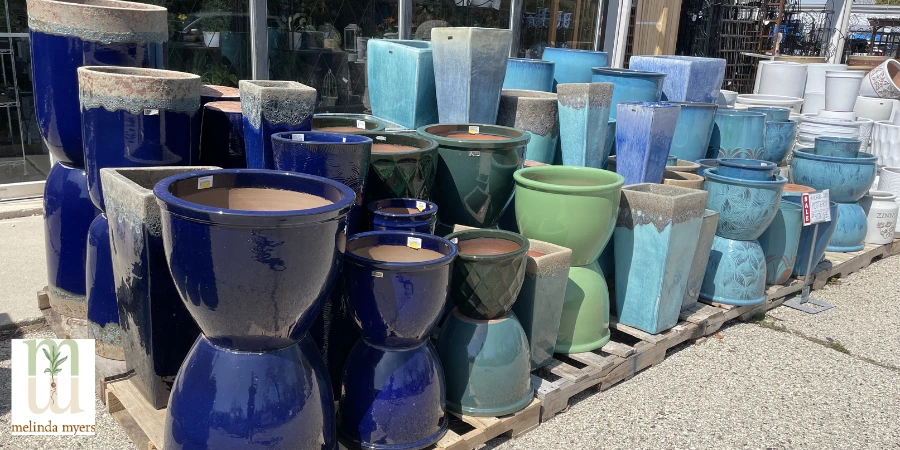
Glazed ceramic pots do not dry out as quickly as terra cotta. They are also heavy reducing the risk of tall plants blowing over in the wind. Like terra cotta, they benefit from being moved indoors during cold winters.
Plastic pots are lightweight, hold moisture longer, and come in a variety of sizes, shapes, and colors. They are somewhat tolerant of cold winters. I have successfully overwintered plants outside in plastic pots. The color fades and pots crack after several cold winters in Wisconsin. But by then it is usually time to move the plants into a larger container. Just avoid hitting the frozen plastic pots with your snow shovel or it will crack.
Fiberglass pots now come in a wide range of colors and designs. These lightweight pots generally tolerate temperature extremes allowing even northern gardeners to keep them outdoors year-round.
Using found items as containers is a fun way to add a bit of history and whimsy to the landscape. It’s also a wonderful way to preserve memories by turning a child’s wagon or father’s work boots into a container. Just make sure they are plant friendly and add drainage holes or double pot as needed.
Tips for Choosing the Best Planting/Potting Mix
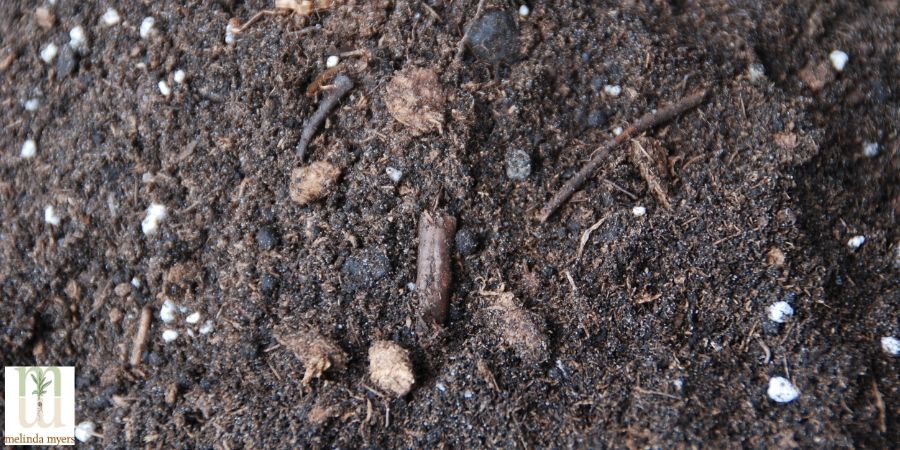
Use a potting mix that provides adequate drainage while holding moisture and nutrients the plant needs. I used to make my own potting mix by combining compost, vermiculite or perlite and topsoil. But as it became harder to find quality ingredients, I started buying potting mix. Find one that works for you and is consistent from bag to bag; it will make maintenance easier. Try several potting mix brands until you find the best product for your gardening style.
I am often asked if it's necessary to change the potting mix for annual containers from one year to the next. It is the best way to reduce the risk of disease. With a relatively short growing season, I want to do all I can to increase my chances of success. If you chose not to change out the potting mix each year, do freshen things up a bit.
Remove the dead annuals and add about 50% new potting mix to your planter. If your container planting suffered from a disease or insect pest the previous season, replace all the potting mix. Disinfect the container by soaking it in a one-part bleach to nine parts water solution for 10 minutes. Then wash and rinse with clear water before planting. Fill with fresh potting mix, and you’re ready to begin planting.
Many gardeners like to save money spent on potting mix or minimize the weight by creating a false bottom in larger containers. They fill the bottom with small cell packs, water bottles, or just about anything to fill the space. If this is you, cover these items with landscape fabric before adding the potting mix. The fabric lets air and water through, but prevents the potting mix from filtering down and into these materials, lowering the soil level. You can purchase products that create a false bottom, prevent soil settling, and maintain drainage.
Keep in mind the more potting mix in the container the more moisture and nutrients it can hold. This means less frequent watering is needed.
Best Plants for Container Gardens
You can grow almost any plant in a container garden. The key to success is matching the plants to the growing conditions, combining those that require the same growing conditions and thrive with the level of care you are willing and able to provide.
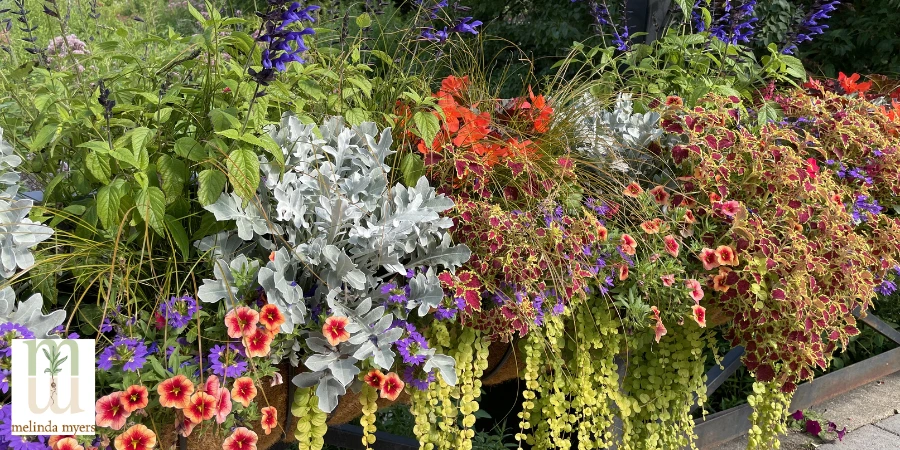
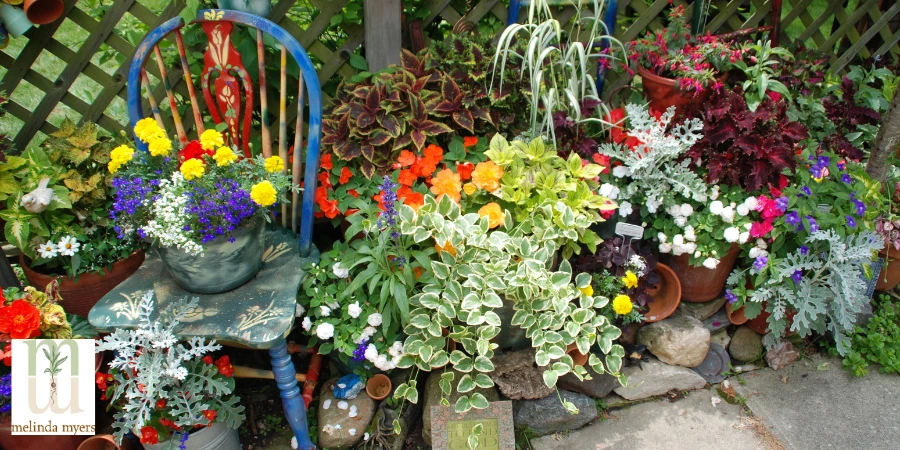
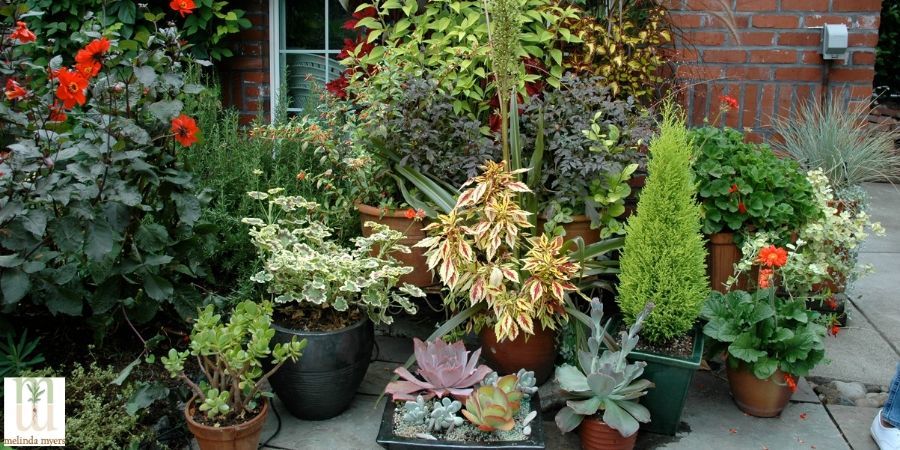
Consider color, texture, and growth habit when selecting and combining plants for container gardens. Use warm color flowers and foliage of reds, oranges, and yellow to draw attention, energize, and evoke feelings of warmth and comfort. Focus on cool colors of blue, purple and green when you want to create a sense of calm and make small spaces feel larger. Big bold flowers and broad leaves create a focal point, while it takes more fine-textured plants with thin leaves and small flowers to have a similar impact. Mixing warm and cool colors and fine and bold textured plants is another way to create an attention-stopping arrangement.
Include fragrant plants to elevate the mood of all who pass through the front door or linger on patios, decks, and balconies. Select varieties like heliotrope and varieties of petunias, iris and nicotiana known for their fragrance.
Reduce maintenance and increase success by using drought-tolerant plants that are best adapted to container gardens, especially those placed in hot sunny locations. Cacti and other succulents, zinnias, lantanas, cockscombs (Celosia), straw flowers, euphorbias, moss roses (Portulaca), gold dust (Mercardonia), bidens, fan flowers (Scaevola), and Mandevillas are just a few to consider.
For shady spots, use ferns, impatiens, fuchsias, begonias, wishbone flower (Torenia), Browallia, and tropical plants suited to the limited sunlight. Check the soil moisture before watering, as containers in shady locations tend to dry out more slowly than those in sunny spots in your landscape.
Don’t overlook perennials when designing your container gardens. Grow them in a weatherproof pot and at least one, preferably two, zones hardier if you plan to leave them in their containers outdoors over winter. Or at the end of the season, move the perennials into a garden bed or provide needed winter care if you are gardening in a colder climate. Just gather your containers together in a sheltered location. Surround these with pots of annuals; they’re dead and waiting for a trip to the compost pile, but in the meantime, they provide needed insulation for the roots. Or cover the pots with woodchips and top with snow. Another option is to sink the pot into the soil in a vacant and sheltered spot in the garden. If garden space is limited move the containers to an unheated garage for winter. Set the pots on a board or piece of carpet or insulation and surround them with bags of shredded paper, potting mix or mulch to help insulate the roots. Water thoroughly whenever the soil is thawed and dry or throw a scoop of deicing salt-free snow on each pot. As temperatures warm the snow melts and waters the plants.
Try growing some of your own food in containers. You’ll find a variety of compact fruits and vegetables to make it easier to do just that.
The thriller, spiller, and filler design method is used by many, and a great place for beginning container gardeners to start. Thrillers are taller plants that provide a vertical accent and typically have outstanding ornamental appeal. Spillers are trailing plants that cascade over the edge of the pot and help anchor the arrangement to the container. Fillers do as the name implies, fill the space between these two groups of plants. As you create more container gardens you will experiment with additional container garden designs. Here are a few plants to consider:
Thrillers
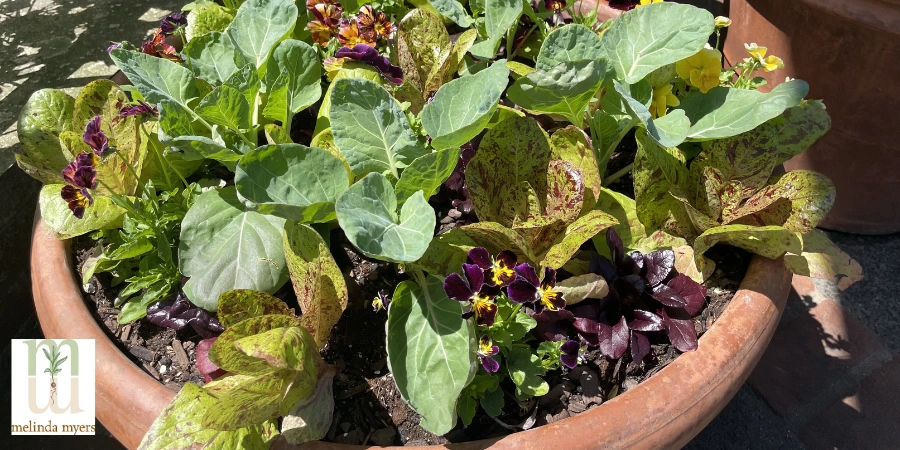
Gladius Brussels Sprouts, Flashy Trout Back Romaine Lettuce, Bull’s Blood Olympia Beet, Brush Strokes Viola
- Spike (Cordyline) a traditional favorite in many parts of the country and now there are many new cultivars
- Phormium, banana, canna, elephant ear, hibiscus, papyrus, palms and other tropical plants
- Ornamental millets, Verbena bonariensis, cleome, sunflowers, snapdragons, stock, gaura, and other spiky annuals
- Annual and perennial ornamental and native grasses & sedges
- Native and cultivated perennials like Russian sage, Penstemon, rattlesnake master, columbine, bug bane, variegated Solomon seal, and others
- Bronze and green fennel, dill, lovage and other tall herbs
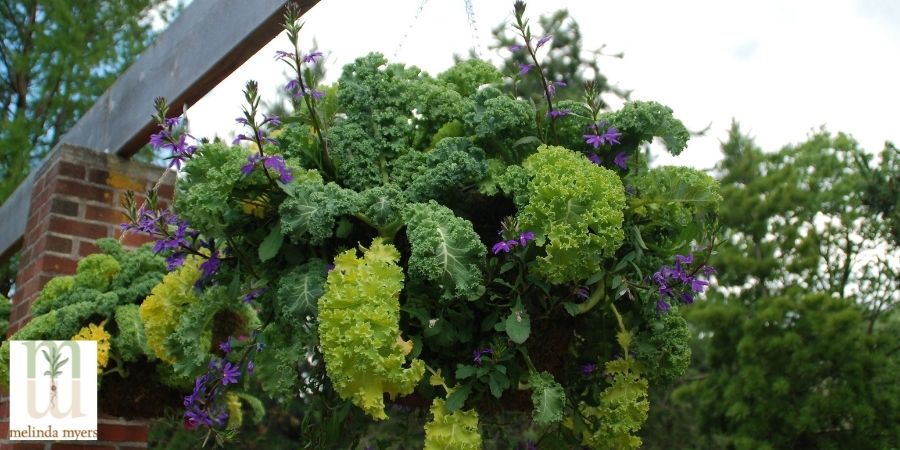
- Corn, Swiss chard, Brussels sprouts, onions and garlic, vining vegetables like cucumbers, pole beans or peas trained on a trellis, ornamental mustard, kale, tomato, pepper and eggplant
- Topiary and dwarf evergreens
- Hydrangeas, red twig dogwood and other deciduous trees and shrubs
- Vines on an obelisk or trellis – SolarTower sweet potato vine, hyacinth bean, morning glory, Spanish flag (Mina lobata), canary and cardinal vines, clematis and Mandevilla
- Branches forced for spring, colorful for winter, or to add height for summer
- Precooled spring flowering bulbs

Spillers
- Vinca vines, Sweet Potato vine, lotus vine, Dichondra 'Silver Falls', licorice vine, golden moneywort and more
- Trailing annuals like calibrachoa, trailing petunias, verbena, scaevola, Mercardonia and more…
- Creeping Rosemary, oregano, mint, nasturtium, sage & strawberries
- Ivies, inch plant (Tradescantia), spider plants, philodendron and other trailing houseplants
Fillers
- Parsley, basil, sage and other herbs
- Cabbage, broccoli and cauliflower
- Lettuce, spinach, beets, radishes and other ornamental vegetables
- Calendula, pansies, nasturtiums and other edible flowers
- Fragrant plants like heliotrope, alyssum and dianthus
- Plants with bird and butterfly appeal like verbena, Pentas, and Cupheas
- Houseplants like ferns, begonias, and polka dot plant
- Perennials like coral bells, geranium, thread leaf coreopsis, and others
- Small annual and perennial ornamental grasses and sedges
- Evergreen branches for winter
Displaying Your Container Gardens
Use containers anywhere additional color is needed, convenient access to herbs and vegetables is desired, or when planting space is limited or missing. I often use container gardens to fill voids in a garden bed left by a failed plant, fading annual, or design gone bad.
Select containers or group containers to complement the style and size of your home. A small pot of flowers on the front steps of a two-story home can look out of place. Instead, use larger containers and taller plants or bigger groupings of pots for greater impact in front of large homes and at wider entryways. Use tall narrow pots for big impact in small narrow spaces. And always make sure you can easily open the door and move through the space when containers are in place.
Fertilize Your Container Plants
Further, reduce ongoing maintenance by using Milorganite a slow-release fertilizer at planting. Just work the recommended rate into the top inch of soil. Small amounts of nutrients will be released over the next 6 to 8 weeks. No weekly mixing and applications needed. Plus, it won’t burn tender transplants or plantings when the weather turns hot and dry.
Make additional applications of Milorganite as needed, about every 6 to 8 weeks. The low nitrogen promotes slow, steady growth that is less susceptible to insects, disease, and drought stress. The non-leaching phosphorus helps promote flowering and fruiting.
Stop fertilizing trees, shrubs, and perennials growing in container gardens in late summer where winters are cold. This allows the plants to begin preparing for the winter ahead. Late-season fertilization can encourage late-season growth that is more subject to winter injury.
Watering Tips for Container Gardens
Watering is often the biggest challenge. Containers need to be checked daily and watered thoroughly when the top few inches of soil are crumbly and starting to dry. Small pots may need to be watered twice a day when the weather is hot and dry. Succulents and drought-tolerant plants prefer a bit drier soil, but still need to be checked daily. Let soil moisture, not the calendar, be your guide.

Self-watering pots, mulch, watering devices, and irrigation systems can help reduce maintenance and increase your growing success. Mulch newly planted containers with shredded leaves or evergreen needles. This helps conserve moisture until the plants grow and cover the soil surface.
Watering spikes attached to water-filled wine and soda bottles allow water to slowly infiltrate the soil, extending the time between watering. This works well for a long weekend or those with a busy schedule. Just monitor and adjust your watering schedule for changes in the weather and as plants mature and require more water.
Utilize a drip irrigation system and a timer to automate watering. You will find an array of DIY systems that are easy to install. Just check often to make sure the water emitters haven’t been knocked out of the containers by squirrels, chipmunks or the wind.
Skip the polymer crystals that absorb water and are supposed to make it available for the plants. Research shows they are not effective. If you decide to give them a try, read and follow the label directions. Adding more can result in soggy soil and root rot. Do consider using some of the sustainable organic products made from wool waste. Research has found these to reduce watering frequency while adding air space and organic matter to the potting mix.
A Bit More Information
Here are a few more tips and tricks to boost your container gardening enjoyment and success:
Fill large pots with potting mix and plants where you want them displayed. Once large containers are fully planted, they can be quite heavy and difficult to move. Set larger containers on wheeled plant caddies if you do need to move them out of the way or into the sun on a regular basis.
Utilize a pot lifter when setting planters in place or moving them indoors for winter. The straps adjust to the container and the pair of handles allows two people to move the pot. This device is helpful even when you do the job yourself. I find some large pots are hard to grip and carry. The pot lifter handles allow me to wrangle these pots alone.
Use pot feet or other surface-saving devices to elevate containers above the patio or deck surface. These allow the containers to drain freely and reduce mold and discoloration of the surface below.
Move non-hardy plants inside for winter to grow alongside your other houseplants. Or let them die quickly with the first killing frost. Add them to the compost pile and consider it an opportunity to try something new next season.
With each new growing season, look for a few new containers, beautiful flowers, and tasty vegetables, then get busy planting. As you fine-tune your container gardening skills, the only challenge left will be your budget.