Transplanting Trees and Shrubs
- horticulturist and gardening expertOctober 13, 2018
When I sold my home on a small city lot the new owners did not want any gardens. So I potted up my plants and we all moved outside the city where I had more space and sunshine. I heeled in the plants and started developing garden beds. Many of the plants were stressed from the move, remained heeled in too long and I was not sure they would survive. Most survived and quite a few surpassed my expectations and now need more space to flourish and grow to their mature size.
This fall I will be making a few changes in my landscape including moving a few shrubs. Since landscapes are dynamic – changing with the season, over time and as our gardening goals evolve, many of you may be planning some small and large changes to your gardens.
You can save those special shrubs and trees by transplanting them into a better space that will accommodate their mature size, growing needs and your landscape design. First, decide if the plant can successfully be moved and is worth saving. Larger specimens, disfigured and struggling plants may need to head to the chipper and be replaced with a more suitable plant. I know its hard but think of it as moving your plant into the garden in a different form, woodchip mulch.
Consider hiring a professional for larger plants. They have the equipment and staff to dig and maneuver the larger rootball needed to successfully move larger plants.
Transplant shrubs and trees in fall as the plants go dormant. The soil is warm and the air is cool; perfect for recovering from the move and establishing roots. Early spring before growth begins is also prime time to make the move. Plants have a chance to adjust before the stress of summer heat.
Safety First
Check for underground utilities before you begin moving plants. Make a free call to 811 at least three business days in advance. They will contact the appropriate companies who will mark the location of their underground utilities in your work area. This helps eliminate the danger and inconvenience of accidentally knocking out power, cable or other utilities while you create a beautiful landscape.
Be sure to check for any conflicts with overhead utilities when selecting a new spot for your plants. Keep trees and tall shrubs away from overhead utilities to eliminate regular and unnatural pruning needed to keep large plants away from the lines.
Keep yourself safe, as well, throughout the process. Wear safety glasses to avoid a stick in the eye. Leather gloves, long sleeves, and pants will reduce the number of cuts and scratches received while moving these large plants.
Root Pruning
Increase your transplanting success with root pruning several months prior to moving trees and shrubs. This stimulates root growth closer to the trunk and stems of the plant helping to compensate for the roots lost during transplanting.
Prune the roots as plants begin to go dormant in fall when transplanting in spring or in spring when transplanting in fall. These are two the times these plants are growing lots of roots.
Start by tying branches of low branched and bushy plants up and out of your way to reduce the risk of damage. Use sturdy twine or cloth strips for this task.
Mark the circle of the desired rootball for transplanting (see the charts below). The larger the plant, the bigger the rootball you’ll need. Just be sure you can manage the size and weight of the plant, soil, and roots. Bigger is only better if the rootball stays intact.
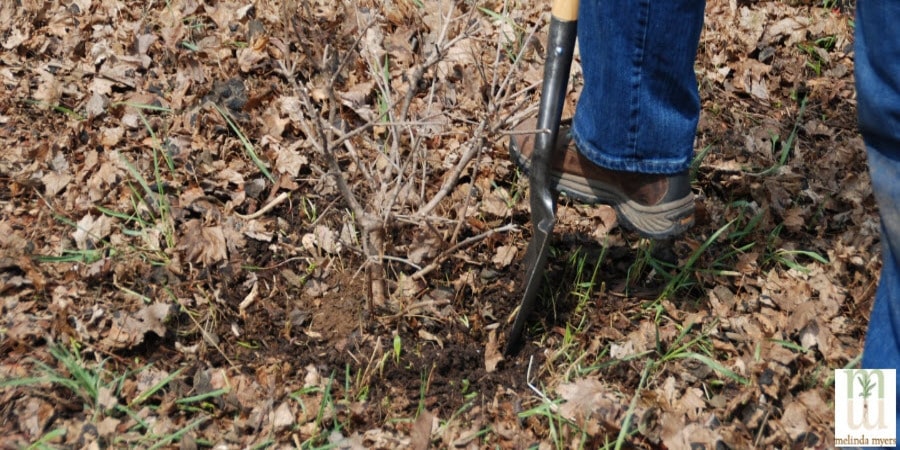
Use a sharp spade to cut through the roots just outside this circle. New roots will form within this area, giving your transplanted trees and shrubs more roots to get them started in their new locations.
Transplanting Shrubs
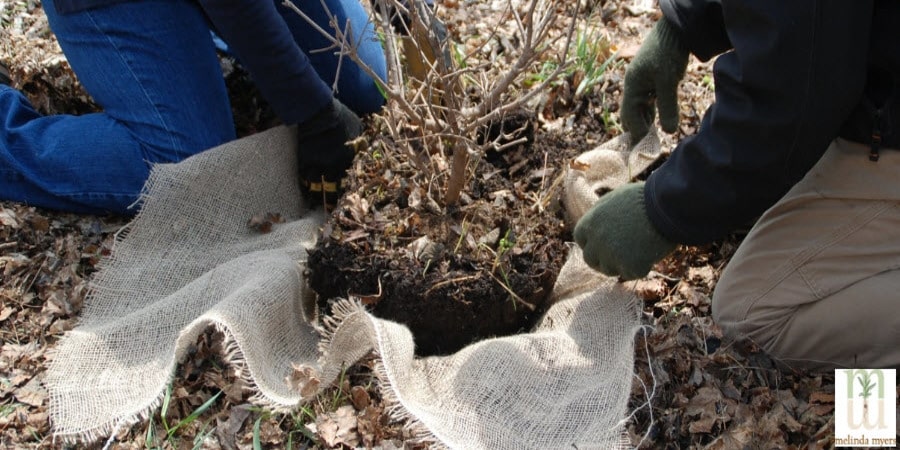
Let’s start with shrubs. Loosely tie the branches to prevent damage and keep them out of your way. Maintaining as much of the top growth as possible helps plants recover more quickly. The more leaf covered branches, the more energy the plant can produce and direct that energy to root growth and recovery.
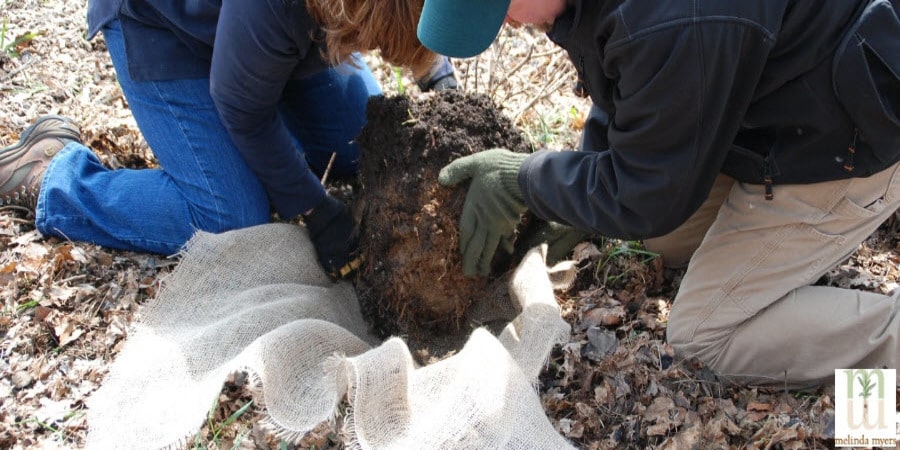
Dig a trench around the shrub slightly larger and deeper than the desired rootball. Undercut the rootball with a shovel. A sharp spade, hand pruner or lopper will help you cut through larger roots.
Make the rootball appropriate for the size of the plant and possible for you to manage. Avoid damaging the heavy rootball, the plant and your back by asking for help.
Slide a piece of burlap or canvas under the rootball to make transporting easier. Everyone grabs a side or corner when lifting and moving is needed. This is easier on your back and reduces the risk of dropping the shrub and damaging the rootball.
Recommended Root Ball Size when Transplanting Shrubs
|
Shrub Height |
Minimum Rootball Diameter |
Rootball Depth |
|
2 feet |
12 inches |
9 inches |
|
3 feet |
14 inches |
11 inches |
|
4 feet |
16 inches |
12 inches |
|
5 feet |
16 inches |
12 inches |
|
6 feet |
16 inches |
12 inches |
Transport your shrub in a wheelbarrow, snow saucer or garden cart. Dig the planting hole the same depth as the rootball and 2 to 3 times wider. The wider hole allows the roots to easily move through the disturbed soil. Set the plant into the planting hole, remove the burlap or canvas sling from under the rootball and out of the planting hole. Roughen up the sides of the planting hole to avoid a glazed surface the roots can’t penetrate.
Make sure the crown of the plant, that’s the area where the roots meet the stem, is even with the soil surface. Fill in the hole with the existing soil. Amending the soil creates more ideal growing conditions that discourage root development beyond the initial planting hole.
Water thoroughly to remove any air pockets. Mulch the soil with a 2-inch layer of shredded bark, woodchips or other organic matter to conserve moisture and discourage weeds.
Continue to water thoroughly when the top four to six inches of soil are crumbly and slightly moist throughout the season or until the ground freezes. It takes shrubs several years to become established. Proper watering and mulch will help reduce transplant shock and encourage healthy growth.
Use Milorganite fertilizer at the rate recommended for the size of the plant you moved. The low nitrogen slow release fertilizer won’t harm developing roots or encourage excessive top growth at the expense of root development. Plus the non-leaching phosphorous promotes root development and the 85% organic matter in Milorganite helps feed the soil.
Wait a year after planting if you decide to use other fertilizers. High nitrogen fast release fertilizer can injure tender roots and encourage excessive top growth that can impede establishment.
Transplanting Trees
Moving trees, especially large ones can be a bit intimidating and heavy work as you can see by the chart below.
Start by loosely tying the lower branches to reduce damage and keep them out of your way. Dig a trench around the tree and slightly deeper than the desired rootball. Undercut the rootball with a sharp spade. Use bypass hand pruners and loppers for larger roots.
Recommended Root Ball Size when Transplanting Trees
|
Tree Diameter at 4 1/2' feet |
Minimum Rootball Diameter |
Rootball Depth |
|
½ inches |
14 inches |
11 inches |
|
¾ Inch |
16 inches |
12 inches |
|
1 |
18 inches |
14 inches |
|
1 ¼ |
20 inches |
14 inches |
|
1 ½ |
22 inches |
15 inches |
|
1 ¾ |
24 inches |
16 inches |
|
2 |
28 inches |
19 inches |
Slide a piece of burlap or canvas under the rootball. Here’s where you want to call in a few favors and ask friends to lend a hand. Sharing the load reduces the risk of dropping and damaging the rootball - undoing all your hard work.
Always move the tree by the rootball, not the trunk. Using the trunk as a handle or lever damages the roots and impacts the short term and long term health of the tree.
Use a garden cart, snow saucer or wheelbarrow to move the tree to its new location. Set the tree in the properly dug planting hole.
Make the planting hole the same depth as the distance between the rootflare and the bottom of the root ball. The rootflare is the place where the roots curve away from the tree trunk. Digging a deeper hole can result in the soil settling and creating a water collecting depression around your tree. Make the hole at least 3 to 5 times wider than the root ball.
Roughen the sides of the planting hole to avoid glazed soil that can prevent roots from growing into the surrounding soil. Remove the burlap or canvas sling from under the rootball and out of the planting hole..
Water thoroughly at planting and whenever the top 4 to 6 inches of soil are crumbly and slightly moist.
Apply Milorganite fertilizer over the soil surface. Follow the recommendations on the bag for the size of the tree you just moved. The low nitrogen slow release fertilizer won’t harm developing roots or encourage excessive top growth at the expense of root development. Plus the non-leaching phosphorous promotes root development and the 85% organic matter in Milorganite helps feed the soil.
Wait a year after planting if you decide to use another type of fertilizer. High nitrogen fast release fertilizer can injure tender roots and encourage excessive top growth limiting root development.
Spread a 2 to 3-inch layer of wood chips over the surrounding soil. And pull the mulch away from the trunk of the tree to prevent rot and disease.
Post-Transplant Care
Do minimal pruning on newly transplanted trees and shrubs. Remove only broken, dead and diseased branches the first few years after transplanting. Late winter or early spring before growth begins is also a good time to prune trees and shrubs. You can remove winter damage, control plant size and shape the plants during one pruning session.
Wait to prune forsythia, lilacs, viburnums and other spring flowering shrubs if you want blossoms. Prune your crabapples and other spring flowering trees in late winter to avoid disease problems. Although they are spring bloomers, these trees usually have plenty of flowers for you to enjoy.
Continue to water thoroughly as needed and maintain a 2 to 3-inch layer of woodchips, shredded bark or other organic mulch on the soil around the plants. Organic mulches help conserve moisture, suppress weeds, prevent soil erosion and improve the soil as they decompose. Create as wide a mulch bed or planting bed as possible. Keeping weeds and lawn grass away from new plantings reduces competition for water and nutrients and speeds recovery and encourage healthy growth and longevity.
Invest time and effort before, during and after moving your favorite trees and shrubs. You will be rewarded with years of beauty and the satisfaction knowing you did this yourself.