The Three Biggest Pruning Mistakes Gardeners Make
- Gardening Expert and Host of Growing a Greener World®September 27, 2025
Pruning is one of those gardening chores that seems easy enough. Grab your clippers, make your cuts, and call it a day. However, the reality is that there is more to consider when making those cuts, and three common pruning mistakes often lead to heartache.
The big three relate to timing, technique, and tools. The good news is, once you understand the science behind making the proper cuts, you can set your plants up for success every time. Otherwise, you could be leaving them stressed, misshapen, or worse. Let’s fix that.
Mistake #1: Pruning at the wrong time
Pruning at the wrong time affects plants in several ways. The first way is that many plants set their flower buds months before you see them bloom. You may not even notice that a new bud is forming, but it often starts shortly after the plant has finished flowering for the current year. If you cut off the bud, there is no flower, even though if left uncut, it wouldn’t bloom until the following year.
A common example is with the big leaf hydrangeas. They put on a spectacular show in mid-summer. But by late summer, the flowers are fading, and it’s a tempting time to do a little tidying up with your pruners. But be careful. Later summer or early fall is when those plants put on their new flower buds for the following summer. That’s because these plants bloom on “old wood”. In your effort to tidy up the plant after flowering, you unknowingly are likely cutting off next summer's flowers.
Another issue related to timing is waiting too late in the year to prune. An old saying with wise gardeners is, “growth follows the knife” (or whatever you are using to make your cuts). Whenever you make a cut on a plant, you are stimulating new growth just below where you make that cut.
Pruning cuts late in the year, as plants are going into dormancy, is not a good time to stimulate new growth. Those young, tender shoots that are growing from the cut branches don’t usually have enough time to harden up enough before cold weather causes them to die back, often leaving behind an open wound where diseases or insect pests may find their way in. Suffice it to say, fall is the worst time to make pruning cuts.
Mistake #2: Wrong technique (how and where you make the cut)
There’s a right and a wrong way to cut your branches. With the exception of larger tree branches (I’ll address next), the proper cut happens about ¼ to ½ inch above a set of leaves, or dormant leaf buds. At that location on the plant, there is a lot of growth hormone that remains dormant as long as that part of the plant is uncut. But once the cut is made, the growth hormones are activated, and healthy new growth emerges around the leaf or bud set.
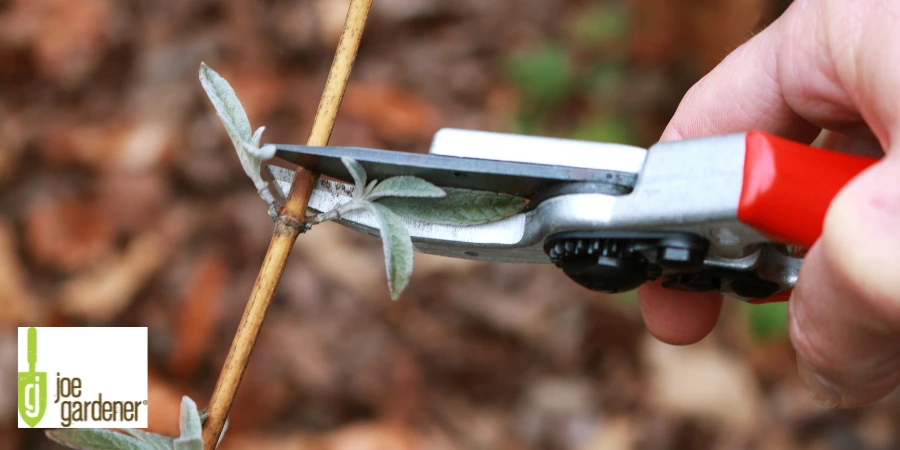
If you cut too far above the leaf or bud sets, there’s nothing there that generates new growth. The newly cut branch or stem often ends up dying back from the tip down, usually leaving a tattered broken area which opens up access into the plant for disease pathogens, insect pests, or excess water.
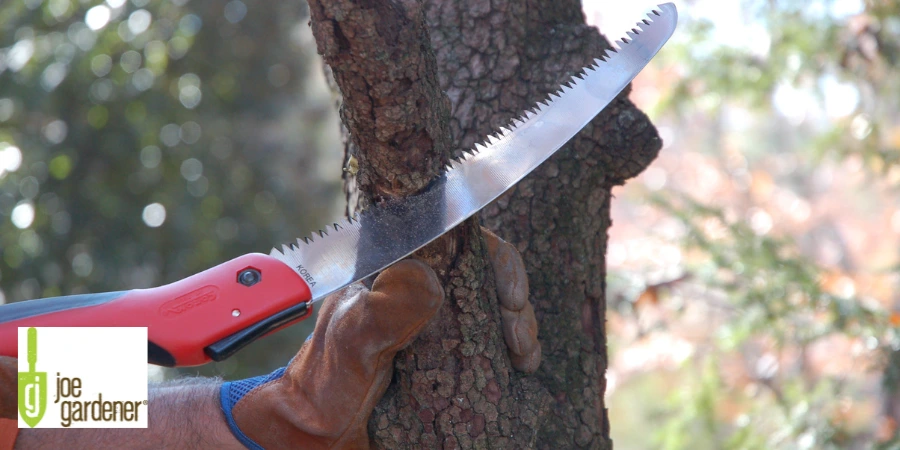
The other mistake related to technique pertains to larger tree branches. A single cut across the branch, from top down, and several inches or more out from the trunk is the mistake. The damage occurs when the weight of the limb causes the branch to give way before the cut is complete. And as it does, the attached bark on that limb is tearing away beyond the cut and towards the trunk. The damage left behind is an open wound, exposed tissue on the trunk. With no bark remaining to protect the wound, it’s another invitation for infection or pest damage.
The correct way to make a branch cut is actually three cuts. The first is out from the trunk, about a foot or two. That cut is made from the underside, about a third of the way into the branch. This is a very important cut and the one that stops the bark from tearing away towards the trunk, once the branch begins to break away.
Cut two happens beyond the first undercut. This cut goes all the way through the branch. As the branch begins to fall away from the weight, the bark is prevented from continuing to tear away beyond the first cut because of the first undercut.
Cut three is very important. It is made close to the trunk but not right up against the edge. Most tree branches meet the trunk with a flared area that is wider than the rest of the branch. Cut three leaves, some of that flared wood intact. By doing so, the tree is able to heal itself by producing a natural callus that will heal over the exposed area and protect the tree from future exposure. Making this cut properly is all that is needed. Do not apply tree sealer to the exposed wound. That can seal in excess moisture and lead to rot.
Mistake #3: Using the wrong tool (or a dull blade)
The third mistake is an easy one to make. The proper type of pruner for all live plants is called a bypass pruner. It’s named that way because the top blade passes by the bottom hook. As it does, (and assuming a sharp blade), it makes a very clean cut. Clean cuts are essential to minimize exposure to the elements for the reasons already mentioned. It also prevents the remaining stem or tissue from being crushed or torn.
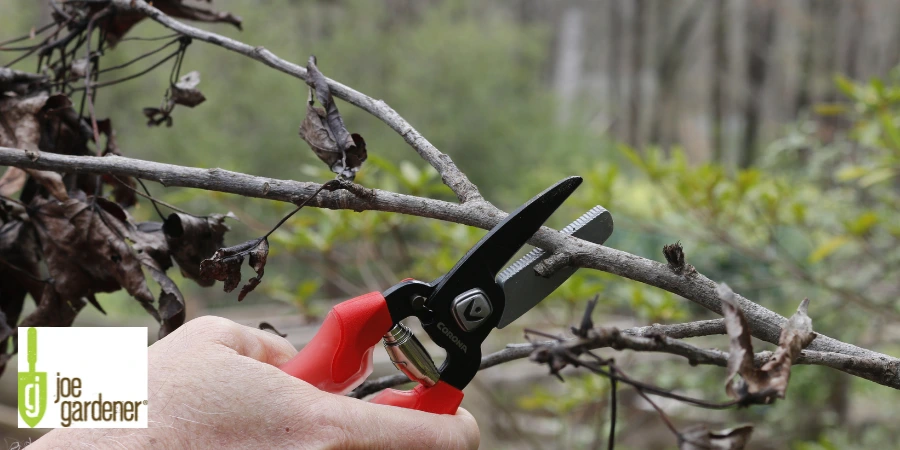
Anvil pruner
Part of the problem here is directly related to not knowing which type of pruner to use. Unlike bypass pruners, the other common style is called an anvil pruner. This style pruner has a blade that comes down directly on the metal plate with whatever you’re cutting, in between the two. So, rather than a clean, bypass cut, the stem is crushed, which is exactly the opposite of what you want to happen. The crushed exposed tissue is now an open wound and a huge invitation for problems.
Anvil pruners have a place, but only with dead wood - never live tissue. Similarly, bypass pruners should only be used with live tissue, and never on dead wood. You can quickly ruin or dull the blade, which is often how those dull blades get that way. Keep your blades in shape with a sharpening tool, and make a habit of doing this regularly. A few passes across the blade from the sharpener, while using the right pruner for the job, will prevent you from ever making this mistake.