Planting Tips for Boosting Curb Appeal
- horticulturist and gardening expertMay 31, 2025
Bring Your Yard to Life
Adding new life to your landscape can seem overwhelming. Starting in the front with small, achievable, and inexpensive upgrades can get the momentum started and make a big difference in the overall curb appeal.
You have probably read that curb appeal increases your home’s value and can shorten the time to a sale. Even if you aren’t planning on selling your home, improving your landscape’s curb appeal has benefits. It makes a beautiful welcome for visitors and can boost your mood every time you walk up to the front door.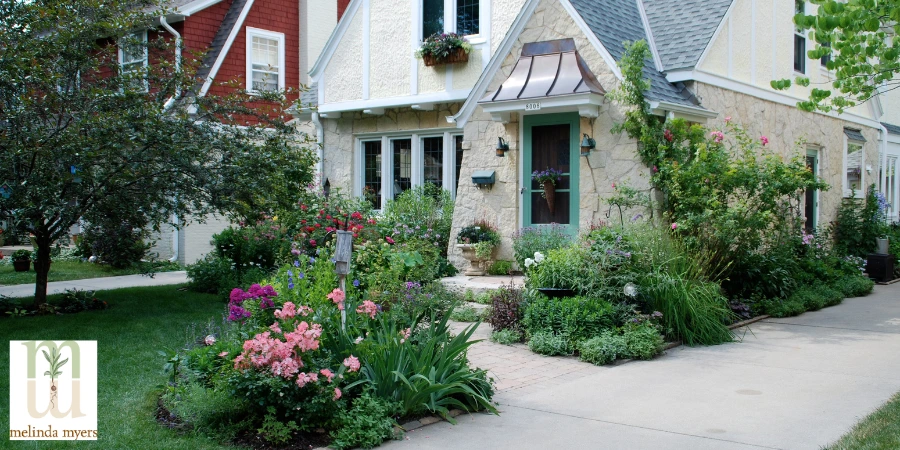
Creating Instant Curb Appeal
You don’t need a lot of time and money to get started. Paint or stain the front door to add new life to a tired entrance and set the stage for additional work. Look to your home’s style as well as the siding and trim color to guide you in the process. Then decide if you want to stand out or blend in with your neighbors. Select a durable paint or stain suitable for this purpose.
Dress it up with a seasonal wreath and a fresh new doormat. You can find lots of options at retail outlets or craft your own. Dried material from your gardens can help tie the door wreath or swag to the surrounding landscape or create something that represents your personality.
Add a few container gardens to the entryway. These make a colorful welcome for family and friends. Include flowers that complement the door color and your home’s siding and trim. Use reds, oranges, and yellows to draw attention, energize, and evoke feelings of warmth and comfort. Create a sense of calm with blues, purples, and greens.
Select containers that are scale-appropriate for your home. Make sure you can easily open the door when placing pots on the front landing. There’s nothing worse than squeezing through a partially opened door with hands full to avoid damaging the flowers. Choose containers large enough to support the plants you want to grow. Big plants in small pots will need frequent watering and are more likely to topple in the wind. They also look out of place. Use tall and narrow pots to make a bold statement in a narrow space, and bigger containers or groupings to make an impact at larger entries.
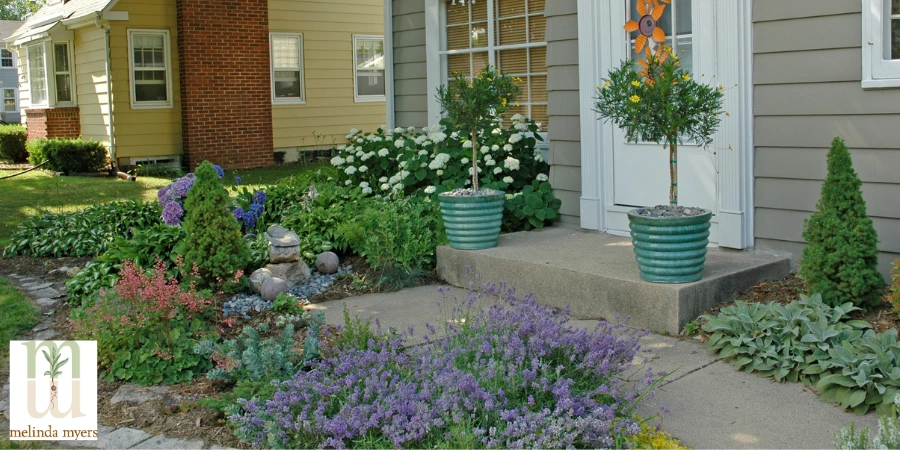
Include a few fragrant flowers to elevate the mood of everyone entering your home. Sweet alyssum, heliotrope, nicotiana, and nemesia are a few fragrant annuals to consider. Add a few herbs like lavender, Rosemary, and thyme as well as scented geraniums that are sure to invite a gentle pet to release their welcome fragrance. A little aromatherapy never hurts, and who doesn’t want guests to be happy when entering your home?
Keep the plants healthy and looking their best with proper care. I use Milorganite fertilizer in my container gardens. I apply it at planting, and if needed, 6 to 8 weeks later. The low-nitrogen, slow-release formula provides small amounts of nutrients over a long period of time. This means I only fertilize once or twice a season. Plus, it promotes balanced above- and below-ground growth and won’t interfere with flowering.
Refresh existing garden beds with a bit of weeding and mulch. Weeds not only ruin the garden’s appearance, but they also compete with your desirable plants for water, nutrients, and sunlight. Many weeds also serve as hosts for insect pests and diseases. Removing them improves the look and health of your garden beds.
Once weeded, finish it off with a layer of organic mulch like leaves, evergreen needles, or shredded bark spread over the soil surface. Organic mulches help keep plant roots cool and moist, suppress weeds, conserve moisture, and as they break down, improve the soil. The finer the mulch, the thinner the layer needed, and generally, the mulch layer should be no more than two to three inches deep. Just pull it away from the trunks of trees, stems, or shrubs and crowns of flowering plants to prevent problems.
No need to remove and replace old organic mulch. It is helping to improve the soil as it decomposes. You can add a bit more mulch as needed to maintain that shallow layer of no more than 2 to 3 inches. Avoid creating thicker layers of mulch that can lead to root rot and the decline of your plants. Instead, lightly rake the existing mulch to freshen the look. Or better yet, make sure you have properly spaced plants that eventually fill the space, reducing the amount of mulch needed.
Do not place landscape fabric under organic mulches. As the mulch decomposes, it creates compost perfect for weed seeds to sprout, grow, and root through the weed barrier, making them difficult to remove. Plus, you prevent all the good organic matter from reaching and improving the soil below.
Do use landscape fabric when using stone mulch. This prevents the stones from moving down into the soil, requiring you to replace them often. It also keeps the stones out of the soil, making it easier to renovate the garden in the future. Remove plant debris and leaves that collect on the stones. These break down, creating organic matter for weeds to grow through the stones and landscape fabric.
Edge planting beds as time allows. You’ll define the space, make it easier to mow around, and slow the infiltration of grass and weeds into the garden. Use a sharp spade or edging shovel to create a V-shaped trench around the garden. Fill it with the same mulch used in the garden. For larger projects, consider renting an edging machine. You and your neighbors may want to join forces and rent the equipment for a weekend for all to use. You’ll share the expense, and no one must store and maintain an additional piece of landscape equipment.

Update your address numbers, making them larger if needed, so delivery people, emergency services and others can find your home. You can purchase the numbers and craft your own sign or order one online. Just like your front door, select a style that complements the overall design and personality of your house and front yard.
Curb Appeal on a Budget
Save money and improve the view by taking advantage of existing plantings. A bit of pruning can bring overgrown shrubs down in size and improve their beauty. Identify the shrubs to determine when and how much pruning they can tolerate. Let the plant be your guide.
Major renovations are best done in late winter or early spring. The plants will soon enter their growth cycle and quickly recover from this work. Wait to prune spring-flowering shrubs like forsythia, lilac, and azaleas until right after flowering to maximize the floral display. Spring-flowering shrubs set their flower buds on wood formed during the summer prior to flowering. Late summer and dormant pruning won’t harm these plants, but they eliminate some or all of the spring blossoms.
Spread major pruning over several years for less stress on the plant and you. Gradually renew suckering shrubs like forsythia and red twig dogwoods by removing a few older, thicker stems to the ground. Reduce the height by no more than one-third. Repeat this over the next two years, and you will be rewarded with healthier, more attractive, and smaller plants with leaves from the ground up. Continue to remove a few older stems every few years as needed to maintain the desired size and appearance.
You may decide to rejuvenate the plant by pruning all the stems back to the ground or a few inches above the soil surface. This type of pruning is stressful on the plant and you, especially if it is the first time pruning. Make sure the shrub can tolerate this type of pruning before you proceed. Severely pruned shrubs often end up taller since all the energy reserves are directed into forming new growth, so additional pruning is needed. Some shrubs like potentillas and Annabelle-type hydrangeas get a bit floppy when pruned this way.
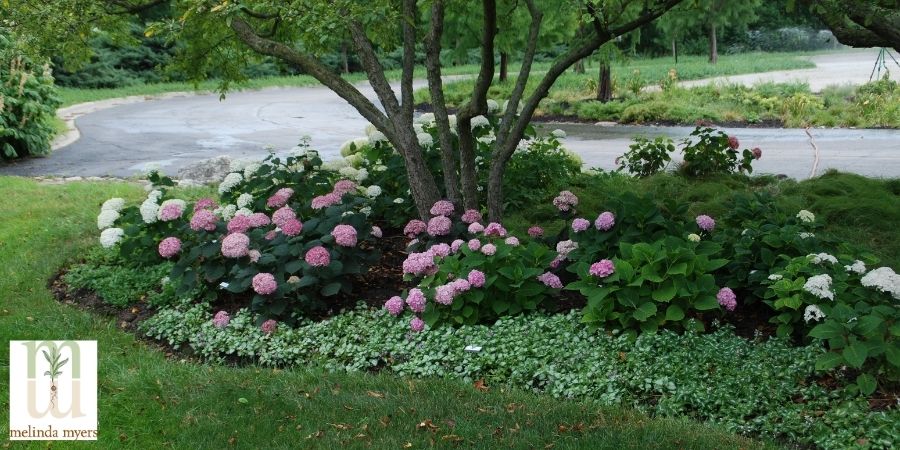
Try a variation on these methods to avoid floppy re-growth on Annabelle-type hydrangeas, potentilla, and summer-blooming spireas. Cut all the stems back to 15 to 18 inches high. Then, remove half of the older stems back to ground level. The taller stems support the new growth, resulting in a smaller plant less prone to flopping.
Maintain the health and natural form of the plant by making all cuts at a slight angle 1/4 of an inch above an outward-facing healthy bud, where a branch meets another outward-facing branch, or to the ground. Cutting too close or too far from the bud or branch results in stubs. These dead tips make great entryways for insects and disease.
If you shear shrubs, make sure the top of the shrub is narrower than the bottom. This allows sunlight to reach all parts of the plants, encouraging leaf growth from the tip of the branches to the ground.
Most evergreens do not tolerate severe pruning, so overgrown evergreens may need to be replaced. Yews, hemlocks, arborvitaes, and junipers are the exception, but brace yourself, it can take one or two seasons for the new needles to develop and cover the exposed old wood.
Avoid fall pruning of evergreens. The tender needles exposed after pruning will be more subject to drying, which results in browning from winter winds and sun. Just remove dead branches and put away your pruning tools until after the holiday season and the worst of winter weather has passed. Once the new spring growth has hardened off, turned the same dark green as the rest of the plant, you can follow up with some touch-up pruning as needed.
Invigorate overgrown, floppy, and poor-flowering perennials with a shovel and a bit of your time and energy. Dig and divide perennials to improve their overall appearance and create new plants to use or share. The best time to divide spring bloomers is in fall, fall bloomers in spring, and summer blooming perennials in either spring or fall. But most gardeners have found the best time to divide perennials is when you have the time.
Use a sharp shovel to dig up the clump. I like to lift the clump out of the soil and use a linoleum knife or drywall saw to cut the plant into smaller sections. Some gardeners use two garden forks back-to-back to pry the clump apart. Discard and compost the dead center if needed.
Try this method when dividing large, hard-to-manage perennials. Use a sharp shovel and dig around the outer edge of the plant to be divided. Then use the shovel to slice through the root ball, dividing the plant into four or eight sections. Now use the shovel to wedge the smaller pieces out of the ground. You can also dig small sections from the outer edge of the plant. This is a good option when the perennial is performing nicely, and you just need a division to share or fill in an empty space in another location.
Prepare the soil for planting the divisions by mixing compost or other organic matter into the top 8 to 12 inches of soil. Set the division in place at the same depth it was growing before. Cover the roots with soil and water thoroughly and often enough to keep the roots slightly moist. After a few weeks, begin extending the time between watering to encourage the plant to develop a robust root system. Continue to water thoroughly as needed throughout the growing season.
Improve your lawn’s appearance with proper mowing and fertilization. Mow high to encourage deep roots, making the grass more drought and pest resistant. Grow cool-season grasses like bluegrass, fescue, and ryegrass 2 ½ to 3 ½ inches tall. Warm-season grasses like bermudagrass, carpetgrass, centipedegrass, and zoysia should be grown at 1 to 2 inches tall, while St. Augustine should be a bit higher, 2 to 3 inches, for best results. Taller grass is also better able to compete with weeds.
Remove no more than 1/3 of the total height of the grass whenever possible. Leave these clippings on the lawn to break down, adding moisture, nutrients, and organic matter to the soil. A season’s worth of clippings is equal to one fertilization.

Save time, fuel, water, and improve the look of your lawn by sharpening your mower’s blades. Dull blades tear the grass instead of making a clean cut, resulting in a dull or brownish cast to the lawn. The ragged tears close more slowly than a clean cut, providing an entryway for disease.
Sharp blades also save time, as you can cut more efficiently when the blades are sharp. And speaking of savings, you’ll consume up to 22% less fuel, and the lawn will use up to 30% less water when using sharp blades.
Check your local municipality for any lawn fertilization regulations. Take a soil test to determine how much and what type of fertilizer is needed. Fertilizing even once a year can improve your lawn’s health and appearance and reduce weed problems. Consider using Milorganite for your lawn as well as your container gardens and planting beds.
Fertilize cool-season grasses around Memorial Day, Independence Day, Labor Day, and once between Halloween and Thanksgiving, but before the ground freezes. Those growing warm-season grasses can be fertilized around Easter, Memorial Day, Labor Day, and at least one month before the first killing frost.
Landscaping for Curb Appeal
As time and budgets allow, consider replacing poor-performing plants. Add new plants suited to the growing conditions and those that will fit the available space once mature. Growing the right type and size plant for the location results in healthy plants that need less ongoing care and pruning. Check the tags and catalogue descriptions for the preferred growing conditions, mature size, and hardiness.
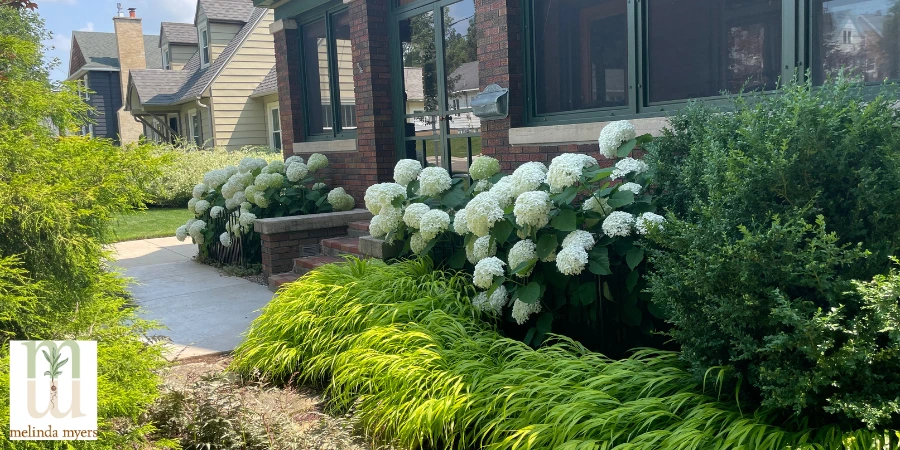
Look for those plants that provide multiple seasons of beauty. Flowering shrubs that produce ornamental fruit, fall color, and interesting bark add year-round beauty to the landscape. Consider those that also attract songbirds and pollinators, adding color and motion to the yard.

Follow the label directions for proper spacing. Crowding the plants increases the risk of disease and the need for more pruning. Fill the empty space between young shrubs with annuals and perennials. These provide instant beauty and can easily be moved as the shrubs grow and fill in.
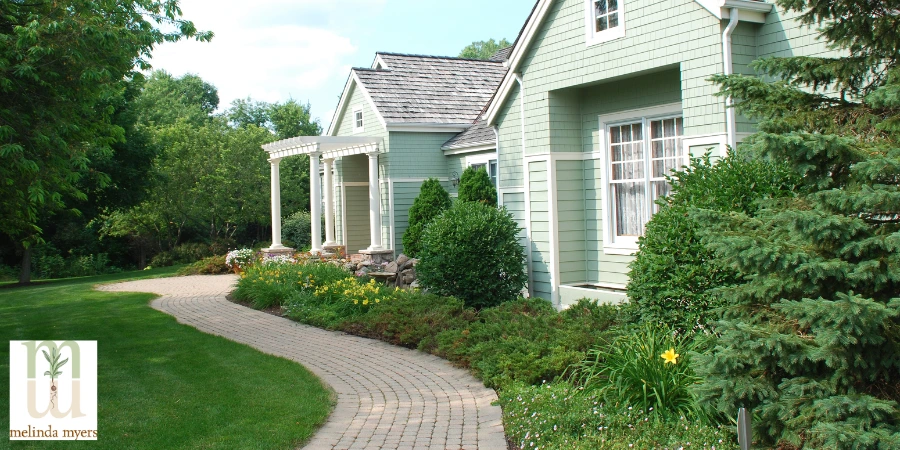
Add a front entrance garden and other planting beds with trees, shrubs, and flowering plants. Start small and expand over time, designing with maintenance in mind. A beautiful landscape is only pretty when properly maintained.
Consider your home’s architecture when creating planting beds and selecting plants. Plants should anchor your home to the landscape without overpowering the house. Keep windows, driveways, and walkways clear for needed visibility and easy access to these spaces.
Creating a beautiful landscape takes time but provides years of enjoyment. Starting with some quick and affordable upgrades provides immediate improvement and satisfaction while you tackle larger projects that require more time, energy, and perhaps money. You’ll appreciate each improvement made every time you enter your front door.